
1. Introduction
Getting the bicycle seat adjustment angle right is one of the most overlooked yet crucial aspects of bike setup. A properly angled saddle directly affects your comfort, riding posture, and overall cycling performance. Even a slight misalignment can lead to discomfort, reduced efficiency, or long-term strain.
Understanding how to adjust your bicycle saddle angle ensures better weight distribution and helps prevent issues like numbness or lower back pain. Whether you’re using a traditional clamp or a bike seat adjustment lever, making the right tilt adjustments can make your ride smoother and more enjoyable.
In this guide, we’ll explore everything from the importance of seat angle to step-by-step adjustment tips—so you can ride with confidence and comfort, no matter your cycling style.
Table of Contents
2. Why Seat Angle Matters in Cycling
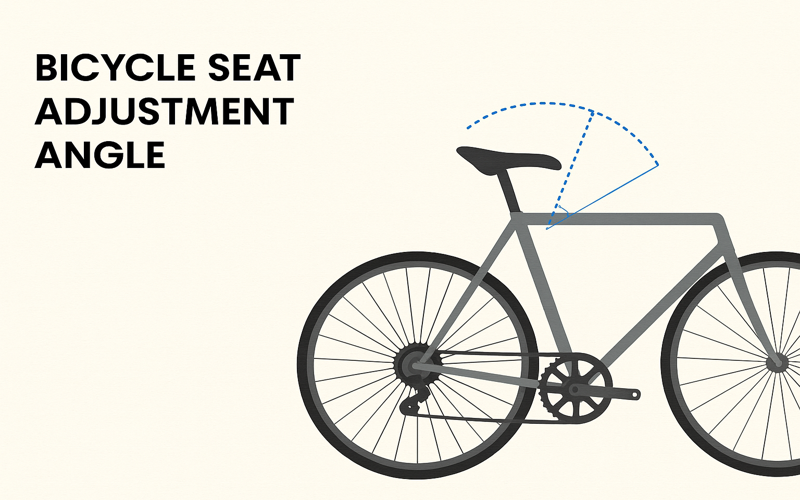
- The angle of your bicycle seat plays a crucial role in both comfort and performance. A properly adjusted bicycle seat angle supports correct body alignment, reduces pressure on sensitive areas, and helps prevent numbness or strain during long rides. Whether you’re commuting, training, or mountain biking, the seat tilt directly impacts your posture and pedaling efficiency.
- When the saddle angle is too far forward, riders often experience sliding, wrist pressure, or knee discomfort. On the other hand, a seat tilted too far back can cause lower back strain and reduce pedal power. That’s why understanding how to adjust bicycle saddle angle is essential—not only for comfort but also for injury prevention.
- Different bikes, like Trek models or MTB setups, may require specific adjustments using a bike seat adjustment lever or hex tools. Minor tweaks can make a significant difference in handling and endurance, especially on challenging terrains.
- In short, optimizing your bicycle seat angle adjustment enhances ride quality, supports proper weight distribution, and boosts overall cycling performance. Getting it right ensures that your bike works with your body—not against it.
3. How to Adjust Bicycle Seat Angle – Step-by-Step Guide
- Adjusting your bicycle seat angle correctly can significantly improve comfort and reduce fatigue during your rides. Follow this simple, step-by-step process to get the perfect saddle tilt for your riding style.
- 1. Loosen the Seat Clamp
- Use a hex wrench or the bike seat adjustment lever, depending on your bike model, to gently loosen the bolt or clamp that holds the saddle in place. This lets you adjust the saddle tilt forward or backward based on your preferred riding position.
- 2. Adjust the Angle
- Set the seat angle to a neutral position—flat and level with the ground is usually a good starting point. For road cyclists, a slight forward tilt can help reduce pressure on soft tissues. Mountain bikers often prefer a slightly rearward tilt for better control on steep descents.
- 3. Align and Secure
- Once the angle feels right, double-check that the saddle is centered and aligned with the bike frame. Tighten the clamp securely, ensuring the seat won’t shift under pressure.
- 4. Test and Fine-Tune
- Take a short test ride. If you feel like you’re sliding forward or experiencing discomfort, make small adjustments. Learning how to adjust bicycle seat angle properly might take a few tries, especially on Trek bikes or specialized MTB frames.
- Proper bicycle seat angle adjustment can prevent common issues like numbness, knee strain, and lower back discomfort. Even small tweaks can make a big difference in how your bike fits and feels.
4. Best Angle Settings for Different Riding Styles
- The ideal bicycle seat angle can vary depending on your riding style, terrain, and personal comfort. Choosing the right tilt enhances control, reduces strain, and maximizes performance.
- 1. Road Cycling
- For road cyclists, a slight downward tilt—around 1–2 degrees—helps reduce pressure on soft tissues and promotes a more aerodynamic position. It’s important not to over-tilt, as this can cause the rider to slide forward.
- 2. Mountain Biking (MTB)
- MTB seat angle adjustment often favors a level or slightly nose-up position. This setup provides better stability and control on steep climbs and technical descents, helping riders maintain balance over rough terrain.
- 3. Commuting and Casual Riding
- Recreational riders and commuters typically benefit from a neutral seat angle—completely level with the ground. This position offers a balanced distribution of weight and is ideal for short to moderate-distance rides.
- 4. Long-Distance Touring
- For endurance riding, even pressure distribution is key. A flat or minimally tilted saddle helps reduce discomfort over time and supports a consistent pedal stroke.
- Understanding the right bicycle seat angle adjustment for your riding style not only boosts efficiency but also prevents common pain points like numbness and back discomfort. A small change in tilt can make a big difference in how your bike feels on the road or trail.
5. Common Mistakes to Avoid During Seat Angle Adjustment
- Improper bicycle seat angle adjustment can lead to discomfort, poor posture, and reduced pedaling efficiency. Avoiding a few common mistakes can make your ride smoother and more comfortable.
- 1. Over-Tilting the Saddle
- Tilting the seat too far forward may cause you to slide forward, putting pressure on your hands and wrists. Over-tilting backward can increase strain on the lower back. Aim for small, precise changes instead of extreme angles.
- 2. Ignoring Saddle Height and Position
- Adjusting the angle without considering saddle height or fore-aft position often leads to imbalances. All three elements—angle, height, and setback—should work together for proper bike fit.
- 3. Skipping Test Rides
- Many riders make adjustments but don’t test them in real riding conditions. Always take short test rides after each tweak to evaluate comfort and performance before finalizing your setup.
- 4. Using the Wrong Tools
- Using incorrect or low-quality tools can damage seat clamps. For bikes like Trek or MTB models, use the right bike seat adjustment lever or torque wrench to avoid over-tightening.
- 5. Adjusting Based on Guesswork
- Eyeballing the seat angle can lead to inconsistent results. Using a digital or bubble level ensures a more accurate and repeatable adjustment.
- Avoiding these mistakes ensures your bicycle saddle angle supports your body correctly, reduces strain, and improves your overall cycling experience.
6. How to Test and Fine-Tune Your Seat Angle
- Once you’ve made your initial bicycle seat angle adjustment, it’s important to test and fine-tune the setup to match your body and riding style. Even small changes can improve comfort and performance.
- Start with a Short Ride
- After adjusting the angle, take a short ride on your usual route. Pay attention to how your body feels—look for signs like hand pressure, lower back strain, or sliding on the saddle. These can indicate that further adjustment is needed.
- Listen to Your Body
- If you’re sliding forward, the saddle may be tilted too far down. If you feel pressure on your lower back or can’t maintain a stable position, the angle may be too far upward. The goal is a balanced position with even weight distribution.
- Make Small, Gradual Adjustments
- Use your bike seat adjustment lever or a hex tool to tweak the angle slightly—no more than 1–2 degrees at a time. Test again after each adjustment. This helps dial in your ideal bicycle saddle angle without overcorrecting.
- Check After Long Rides
- Your body reacts differently during extended rides. It’s wise to re-evaluate your setup after longer sessions to ensure continued comfort and performance.
- Fine-tuning your bicycle seat angle ensures the perfect fit, reduces fatigue, and helps prevent common issues like numbness or joint strain—making every ride more enjoyable and efficient.
7. Troubleshooting: Signs Your Seat Angle is Incorrect
- An improper bicycle seat angle adjustment can lead to discomfort and negatively impact your riding performance. Recognizing the warning signs early can help you correct the issue before it causes long-term problems.
- 1. Sliding Forward While Riding
- If you find yourself constantly shifting forward on the saddle, it’s likely tilted too far down. This can strain your wrists, arms, and shoulders, especially during long rides.
- 2. Lower Back or Hip Discomfort
- A saddle angled too far upward can cause pressure on your lower back and hips. This is a common issue in both road and MTB seat angle adjustment when the tilt is set incorrectly.
- 3. Numbness or Tingling
- Persistent numbness in the hands, feet, or soft tissue area may be due to poor weight distribution caused by an incorrect seat angle. Fine-tuning the tilt can relieve this pressure.
- 4. Inconsistent Pedal Stroke or Loss of Power
- If your pedal motion feels off or you’re losing efficiency, your seat angle might be disrupting your natural alignment, making it harder to maintain a smooth cadence.
- 5. Discomfort Despite Correct Saddle Height
- Even if your saddle height is spot on, the angle could still be the issue. That’s why knowing how to adjust a bicycle seat angle is just as important as height and position.
- Spotting these signs early allows you to make the necessary bicycle saddle angle corrections and improve comfort, stability, and riding performance.
8. When to Seek Professional Help
- While basic bicycle seat angle adjustment can often be done at home, there are times when consulting a professional bike fitter is the smartest choice. If you’re still experiencing discomfort after multiple adjustments—or struggling to find the right balance between saddle height, tilt, and fore-aft position—a professional assessment can make a big difference.
- Persistent pain, such as numbness, knee strain, or lower back discomfort, often signals deeper fit issues that go beyond seat angle. A professional bike fitter will assess your movement patterns, cycling position, and pedal technique to tailor the bike setup specifically to your needs.
- Professional help is especially recommended for riders using performance bikes, including Trek models, road bikes, or MTBs, where precision adjustments are critical to comfort and efficiency.
- If you’re unsure whether your discomfort is due to saddle tilt, seat height, or something else entirely, don’t guess. Seeking expert advice ensures your bicycle saddle angle and overall setup support your riding goals—and your body.
9. Conclusion
- Getting the bicycle seat angle adjustment right is essential for comfort, efficiency, and injury prevention. No matter your experience level, adjusting your saddle to the right angle can significantly improve comfort and overall ride quality.
- From understanding why seat angle matters to learning how to adjust bicycle seat angle step by step, fine-tuning your setup helps avoid common discomforts and improves posture and performance. Every rider is different, so it’s important to test and tweak the angle based on your body and riding style.
- If adjustments don’t solve your issues, seeking professional help ensures your bike fit is truly optimized. In the end, a well-aligned bicycle saddle angle supports not only better rides but also better health on every journey.
10. FAQs
1. What is the ideal bicycle seat adjustment angle?
The ideal seat angle is typically level or slightly nose-down (around 0 to -3 degrees). It depends on your riding style and comfort. A level saddle works best for most riders, offering balanced weight distribution and reducing pressure.
2. What’s the proper way to adjust the angle of a bicycle seat?
To adjust the saddle angle, locate the bike seat adjustment lever or bolts under the saddle. Gently loosen the bolts, position the saddle at your preferred angle, then tighten them firmly back into place. Always test your position before riding long distances.
3. Can a wrong seat angle cause pain or discomfort?
Yes, an improper bicycle saddle angle can lead to numbness, lower back pain, and knee strain. A saddle tilted too far upward or downward affects posture and pressure points, making your ride uncomfortable.
4. Should I tilt my saddle forward or backward?
A slight forward tilt can reduce pressure on soft tissues, especially during aggressive rides. A backward tilt is rarely recommended as it may cause sliding and back strain. Always fine-tune based on your riding position.
5. How do I know if my seat angle is correct?
Signs of a proper seat angle include even pressure on the saddle, no sliding, and no pain during or after rides. If you’re constantly adjusting your position or feeling discomfort, your seat angle may need tweaking.
6. Is professional bike fitting necessary for seat angle adjustment?
If you’re struggling to find the right saddle tilt or experiencing persistent discomfort, a professional bike fit can help. Experts analyze your biomechanics and riding style to set the ideal bicycle seat angle.
7.Are seat angle settings different for mountain bikes and road bikes?
Yes, MTB riders may benefit from a slightly nose-down saddle for control on descents, while road cyclists often prefer a neutral angle for efficiency. Each style may require different adjustments for optimal performance.