
1. Introduction
Knowing how to put front wheel on bike with disc brakes is an essential skill for any cyclist, whether you’re performing routine maintenance, fixing a flat, or reassembling your bike after transport. While the process may seem intimidating to beginners—especially with the added complexity of disc brakes—it’s straightforward when approached with the right knowledge and preparation.
Disc brake systems require precise alignment of the rotor within the brake caliper and a secure axle connection, whether your bike uses a quick-release or thru-axle system. Incorrect installation can lead to issues like brake rub, reduced stopping power, or even unsafe riding conditions.
This guide provides a clear, step-by-step approach tailored for both road bikes and mountain bikes. You’ll learn how to properly prepare your setup, select the correct tools, and install the front wheel safely without damaging key components like the rotor or brake pads.
With a focus on accuracy, safety, and user-friendly instructions, this article will help you confidently put the front wheel back on your bike—whether or not it has disc brakes—ensuring reliable performance on every ride.
2. Understanding Disc Brake Systems
Disc brake systems are a modern and highly effective braking solution commonly found on both mountain bikes and road bikes. Unlike traditional rim brakes, disc brakes rely on a rotor—a metal disc mounted to the wheel hub—that is slowed by calipers applying pressure through brake pads. This system delivers consistent and reliable stopping power, especially in wet or muddy conditions where rim brakes often struggle.
There are two primary types of disc brakes used on bicycles: mechanical and hydraulic. Mechanical disc brakes operate via a traditional cable system, similar to rim brakes. They are easier to adjust and maintain, making them a practical choice for casual riders or those new to bike maintenance. Hydraulic disc brakes, on the other hand, use fluid pressure to actuate the calipers, offering superior modulation, more powerful braking force, and automatic pad adjustment. This makes them a preferred option for performance riders, especially on steep terrain or in competitive environments.
Proper alignment of the disc rotor within the caliper is critical to ensure optimal braking performance and to prevent issues like rotor rubbing or uneven pad wear. Before installing the front wheel, it’s important to inspect the rotor for any bends, warping, or debris that could interfere with brake function. Handle the rotor only by its edges to avoid contamination with oils or grease, which can reduce braking efficiency.
If the brake pads have compressed while the wheel was off, using a pad spreader or a clean, flat tool can help gently reset them to accommodate the rotor during reinstallation. Ensuring a secure and aligned fit of the rotor between the brake pads is essential to safe riding and smooth wheel function.
Understanding how disc brakes work—and how they interact with the wheel during installation—provides both safety and confidence. Whether you’re reinstalling the front wheel after transport or upgrading components, this foundational knowledge helps ensure a precise, efficient setup every time.
3. Required Tools and Setup
Before reinstalling the front wheel on a bike with disc brakes, having the correct tools and a proper setup is essential for both safety and efficiency.
Begin by placing the bike on a stable surface. A bike repair stand is ideal, as it lifts the bike off the ground and provides unrestricted access to the fork and front axle. If a stand is not available, resting the bike upside down on a soft surface can also work, but care should be taken to protect the saddle and handlebars.
The tools required will vary slightly depending on your bike’s axle type. For bikes with a quick-release system, no additional tools may be necessary beyond your hands. However, bikes with a thru-axle will typically require a hex key—commonly 5mm or 6mm—to loosen and secure the axle bolt.
Additional tools that may be helpful include a torque wrench to secure the axle to manufacturer specifications, a clean cloth to wipe the rotor and hub area, and a pad spreader tool in case the brake pads have compressed during storage or transport. Always handle the disc rotor by the edges to avoid contamination from grease or dirt, which can impair braking performance.
Before mounting the front wheel, inspect the rotor for any signs of damage, and ensure it is properly aligned with the caliper. This alignment is critical for smooth operation and to prevent rubbing or noise during use. Also, verify that the brake caliper is firmly attached and not loose, and double-check the pad spacing to make sure the rotor will fit cleanly between the pads.
A well-prepared setup not only makes the installation process easier but also ensures the reliability and safety of your braking system once you’re back on the road or trail.
4. Preparation Before Wheel Installation
Proper preparation before installing the front wheel on a bike with disc brakes is crucial for ensuring a safe, efficient, and hassle-free process. Skipping this step can lead to misalignment, rotor damage, or poor braking performance.
Start by placing your bike in a stable and upright position. A bike repair stand offers the best support and access, but if unavailable, gently resting the bike upside down on a clean surface will suffice. Make sure the bike is balanced to prevent accidental tipping while working.
Inspect the disc rotor for dirt, debris, or signs of warping. A clean, undamaged rotor ensures optimal braking once the wheel is in place. Use a lint-free cloth or isopropyl alcohol to wipe down the rotor, being careful not to touch the braking surface with your fingers, as oils can contaminate the pads.
Next, examine the front fork and caliper area. Look for any loose bolts or misaligned components. Check that the caliper is firmly secured and that the brake pads are spaced properly. If the pads have closed during transport or maintenance, use a plastic pad spreader or tire lever to gently reset them.
Ensure that the axle type—whether it’s a thru-axle or quick-release—is compatible and ready for reinstallation. For thru-axles, confirm that the threading is clean and lightly lubricated if needed. For quick-release systems, check that the skewer is properly assembled and adjusted for your fork’s width.
This preparation stage not only simplifies the wheel installation process but also prevents common issues such as rotor rubbing, poor wheel alignment, or uneven brake pad wear. Taking the time to verify each component before installation reflects proper bike care and enhances overall safety during your ride.
5. Step-by-Step: How to Put Front Wheel on Bike with Disc Brakes
Installing a front wheel on a bike with disc brakes requires attention to alignment, brake spacing, and axle security. Whether your bike uses a thru-axle or quick-release system, following these steps ensures proper fitment and reliable braking performance.
Begin by placing the bike in a secure and stable position, preferably on a repair stand. If a stand is not available, carefully flip the bike upside down, resting it on the saddle and handlebars. Make sure the brake caliper is aligned and the pads are spaced wide enough to accommodate the rotor.
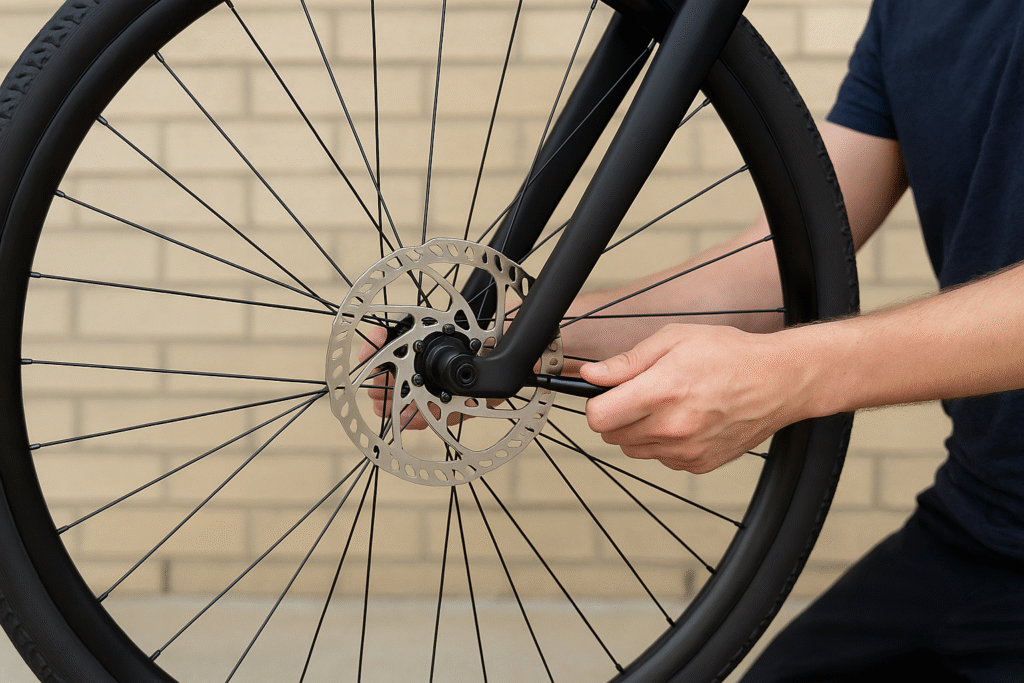
Position the wheel so the disc rotor aligns with the caliper opening. Slowly guide the wheel into the fork dropouts, keeping the rotor straight and avoiding contact with the brake pads until the rotor is between them. This step is critical, as any misalignment can cause rotor rub or pad damage.
Use a hex key if required and tighten it to the manufacturer’s torque specification. For quick-release systems, ensure the skewer is properly assembled, then close the lever firmly while adjusting the nut on the opposite side for a snug fit.
Once the wheel is secured, spin it to check for smooth rotation. Listen for any rubbing or resistance, which may indicate misalignment. If necessary, adjust the caliper slightly or reposition the wheel. Check that the axle is tight and the rotor spins freely between the brake pads without contact.
Finally, test the front brake lever to ensure proper engagement and responsiveness. If the lever feels soft or the rotor doesn’t stop effectively, recheck the wheel alignment and pad spacing. A correctly installed front wheel with disc brakes guarantees better control, safety, and overall ride performance.
6. Special Considerations: How to Put Front Wheel on Mountain Bike
Installing a front wheel on a mountain bike with disc brakes involves a few unique considerations due to the bike’s design, terrain use, and component differences. Unlike road bikes, mountain bikes often use wider tires, larger rotors, and more robust suspension forks, all of which require careful attention during wheel installation.
Begin by confirming that the rotor is compatible with the fork’s caliper spacing, particularly if using larger 180mm or 203mm rotors. These sizes offer stronger braking but require precise alignment to avoid rotor rub or brake squeal. Before inserting the wheel, inspect the rotor for damage and clean it to prevent contaminants from reducing braking performance on rugged trails.
Most modern mountain bikes feature a thru-axle system for added stiffness and durability. Make sure the axle threads are thoroughly cleaned and free from any dirt or debris before sliding it through the hub and fork. Tighten it securely using a torque wrench or hex key to the manufacturer’s specifications.
Mountain bike suspension forks can compress when pressure is applied, which may affect wheel alignment during installation. To counter this, support the bike properly using a repair stand or stable surface, and avoid putting weight on the fork as the wheel is inserted. Gently guide the rotor between the brake pads without forcing it—precision is essential to avoid damaging the caliper or bending the rotor.
Once installed, spin the wheel to ensure smooth rotation and proper disc alignment. Check for any signs of rubbing or noise. Engage the front brake to verify lever feel and brake response. If any resistance or uneven pressure is felt, recheck the wheel position and caliper alignment.
Correctly installing the front wheel on a mountain bike ensures reliable performance on technical trails, downhill descents, and rough terrain.
7. How to Put a Front Wheel Back on a Bike Without Quick Release
Reinstalling a front wheel on a bike without a quick-release mechanism requires a slightly different approach, as bolt-on axles rely on tools for secure attachment. This system is common on older bikes, single-speed models, and some entry-level mountain bikes. While it offers a more theft-resistant setup, it’s essential to follow precise steps to ensure safety and wheel alignment.
A bike stand is ideal, but flipping the bike upside down on a clean, soft surface also works. Make sure the disc rotor enters cleanly between the brake pads without resistance or contact.
With the wheel positioned correctly, insert the axle bolts or nuts onto both sides of the hub. Use an appropriately sized wrench—typically 15mm—to tighten each side gradually and evenly. Alternate sides during tightening to keep the wheel centered within the fork. Avoid overtightening, as excessive force can damage the threads or deform the dropout slots.
Before final tightening, double-check that the rotor spins freely between the brake pads and does not rub against the caliper. Make small adjustments if necessary by repositioning the wheel or loosening the bolts slightly to realign.
Once the axle nuts are secure and the wheel is aligned, spin the wheel to confirm smooth operation. Test the front brake for responsiveness and proper engagement. If the brake lever feels soft or inconsistent, inspect the caliper position and pad spacing.
Installing a front wheel without a quick-release system takes a bit more time but offers strong, reliable performance when done correctly. Always carry the correct tools when riding, as you’ll need them to remove or reinstall the wheel in case of roadside repairs or flat tires.
8. How to Remove Front Wheel from Bike (With or Without Disc Brakes)
Removing the front wheel from your bike is a straightforward process but requires careful attention—especially when disc brakes are involved. Whether you’re performing maintenance, fixing a flat, or transporting your bike, proper technique ensures safety and prevents damage to components like the rotor or caliper.
Start by placing the bike on a stable surface or using a repair stand. If one isn’t available, flip the bike upside down, resting it gently on the saddle and handlebars. For bikes with disc brakes, avoid squeezing the brake lever once the wheel is off, as this can cause the pads to compress, making reinstallation difficult. In such cases, insert a pad spacer between the brake pads to maintain the correct gap.
For bikes with a quick-release axle, open the lever fully and loosen the adjusting nut slightly if needed. Hold the wheel and gently lift the bike’s fork away from the hub until the wheel slides out. If your fork has safety tabs, you may need to angle the wheel slightly to clear them.
If your bike uses a thru-axle system, use the appropriate hex key or handle to unscrew and remove the axle completely. Once it’s out, support the wheel and gently lower it from the fork dropouts, ensuring the rotor clears the brake caliper without contact.
On bikes without disc brakes, the process is similar, but there’s no rotor to consider. However, if rim brakes are present, you may need to release the brake calipers to allow the tire to pass through. This is usually done via a quick-release mechanism on the brake arms or a barrel adjuster on the brake cable.
Once the wheel is removed, avoid setting it down with the rotor facing the ground, as this can bend or contaminate the disc surface. Store the wheel in a clean, upright position. If transporting the bike, always reinstall the thru-axle or skewer back into the fork to protect the dropouts from damage.
Always keep essential tools, such as a hex key set or wrench, in your bike kit for on-the-go adjustments.
9. Troubleshooting & Pro Tips
Even with careful installation, minor issues can occur when putting the front wheel back on a bike with disc brakes. Recognizing these problems early and applying quick, expert fixes can prevent long-term damage and ensure a smoother, safer ride. Below are common troubleshooting scenarios and pro-level tips to help you resolve them efficiently.
If the front wheel doesn’t seat properly in the fork, inspect the dropouts and axle. Dirt or debris may be preventing a flush fit. When using a thru-axle, avoid cross-threading by turning it backward until it clicks before tightening.
Rotor rub is a frequent issue after wheel installation. If you hear a scraping sound while spinning the wheel, the rotor may be slightly misaligned inside the brake caliper. Loosen the caliper bolts slightly, squeeze the brake lever to center the caliper, then re-tighten the bolts evenly. This often resolves mild rubbing without further adjustment.
In some cases, brake pads may appear too tight after removing and reinstalling the wheel. Use a plastic pad spreader or clean tire lever to gently push the pads apart, making room for the rotor.
Always ensure the wheel is centered between the fork legs before final tightening. Uneven axle placement can lead to brake misalignment or compromised handling, especially on rough terrain. A quick spin test should reveal whether the wheel is tracking straight and free of resistance.
For best results, periodically inspect the rotor for warping and the axle bolts for correct torque. Keeping a multi-tool or hex key in your ride kit is a smart habit, especially for riders without quick-release systems.
Professional mechanics also recommend applying a small amount of anti-seize compound or bike-specific grease to axle threads for easier removal and longer component life. However, avoid getting any lubricant near the rotor or pads to maintain optimal braking performance.
With the right tools and a focused approach, minor problems during front wheel installation can be easily corrected, resulting in better safety, smoother rides, and increased confidence in your bike maintenance skills.
10. Conclusion
Reinstalling the front wheel on a bike with disc brakes may seem complex at first, but with the right preparation, tools, and technique, it becomes a straightforward and essential skill for any cyclist. Whether you’re working with a quick-release system or a thru-axle, proper alignment of the rotor, secure axle installation, and careful handling of the brake components are key to ensuring safety and smooth performance.
Understanding how disc brake systems function, preparing your workspace, and following a structured, step-by-step approach can help you avoid common issues like rotor rub or pad misalignment. Always double-check that the rotor spins freely, the brake caliper is properly aligned, and the axle is firmly secured before riding.
For bikes without quick-release mechanisms, using the correct tools and maintaining equal tension during bolt tightening will ensure the wheel is centered and stable. Incorporating regular safety checks and carrying basic tools like hex keys or a pad spreader can prevent problems during roadside repairs or maintenance.
Mastering this process not only improves your bike handling but also builds confidence in your ability to perform routine maintenance. With consistent practice and attention to detail, you’ll be able to safely put the front wheel back on any bike equipped with disc brakes.
11. FAQs
1. How do I align the disc rotor correctly when reinstalling the front wheel?
To align the rotor, gently lower the front wheel into the fork dropouts, making sure the rotor slides between the brake pads without contact. Avoid forcing the wheel if resistance is felt—this could damage the caliper or bend the rotor. Ensure the wheel is centered and seated properly before tightening the axle.
2. Can I put the front wheel back on if my bike doesn’t have a quick-release skewer?
Yes. If your bike uses a thru-axle or bolt-on axle system, use the appropriate tool (usually a hex or socket wrench) to tighten it securely. Ensure the axle threads are clean and torque specifications are followed to avoid over-tightening or under-securing the wheel.
4. Do I need any special tools to remove or reinstall a front wheel with disc brakes?
Most bikes only require a basic hex wrench or quick-release lever. However, for bolt-on axles or some thru-axle designs, you may need a torque wrench or specific removal tool depending on the brand and model.
5. Is it safe to touch the disc rotor during wheel installation?
Avoid touching the disc rotor with bare hands. Oils from your skin can contaminate the surface, affecting braking performance. If touched accidentally, clean the rotor with isopropyl alcohol before riding.
6. How do I reinstall a front wheel on a mountain bike with suspension?
The process is similar, but ensure the axle passes cleanly through the fork lowers and that the suspension isn’t compressed during installation. Also, double-check rotor alignment, especially with wider tires and chunkier calipers often found on mountain bikes.
7. What should I do if my axle won’t thread back into the fork?
Inspect the threads on both the axle and fork for dirt, damage, or cross-threading. Clean both components carefully and retry with gentle, straight alignment. Never force the axle; this could strip the threads or damage the hub.
8. Can I transport my bike without the front wheel?
Yes. If you’re removing the front wheel for transport, use a rotor spacer in the brake caliper to prevent the pads from compressing. This makes reinstalling the wheel easier and avoids brake service issues later.