1. Introduction
If you’re wondering how to raise handlebars on an old bike, you’re not alone—many cyclists with vintage or older models face this common challenge. Whether you’re dealing with a classic quill stem system or simply aiming to improve your riding posture, adjusting handlebar height is essential for comfort, control, and long-term joint health.
Older bikes, including vintage mountain bikes, often use different hardware than today’s modern threadless systems. Knowing how to adjust your bike properly not only enhances your riding experience but also helps prevent neck, back, and wrist discomfort. This guide will walk you through everything you need—from tools and step-by-step instructions to alternative solutions—so you can ride more comfortably and confidently.

2. Why Raising Handlebars on Older Bikes Matters
- Proper handlebar height is essential for maintaining a natural riding posture, especially on vintage or older bikes.
- Knowing how to raise handlebars on old bike setups can help reduce pressure on your neck, wrists, and lower back.
- Older bikes typically use quill stems, which are often easier to adjust than modern threadless systems.
- Raising the bars allows for a more upright riding position—ideal for casual riders, commuters, or those dealing with joint pain.
- Many older mountain bikes and road bikes were designed with a more aggressive posture; adjusting bar height can improve comfort for modern needs.
- A properly positioned handlebar improves control and balance, especially when navigating city streets or rougher roads.
- For riders restoring or repurposing old bikes, adjusting the handlebars is a key step in customizing fit and ride quality.
- This adjustment is also crucial before making other changes like replacing grips, stems, or learning how to change handlebars on mountain bike setups.
3. Identifying the Handlebar System on Your Old Bike
- Most older bicycles, including vintage road and early mountain bikes, use a quill stem system rather than a modern threadless headset.
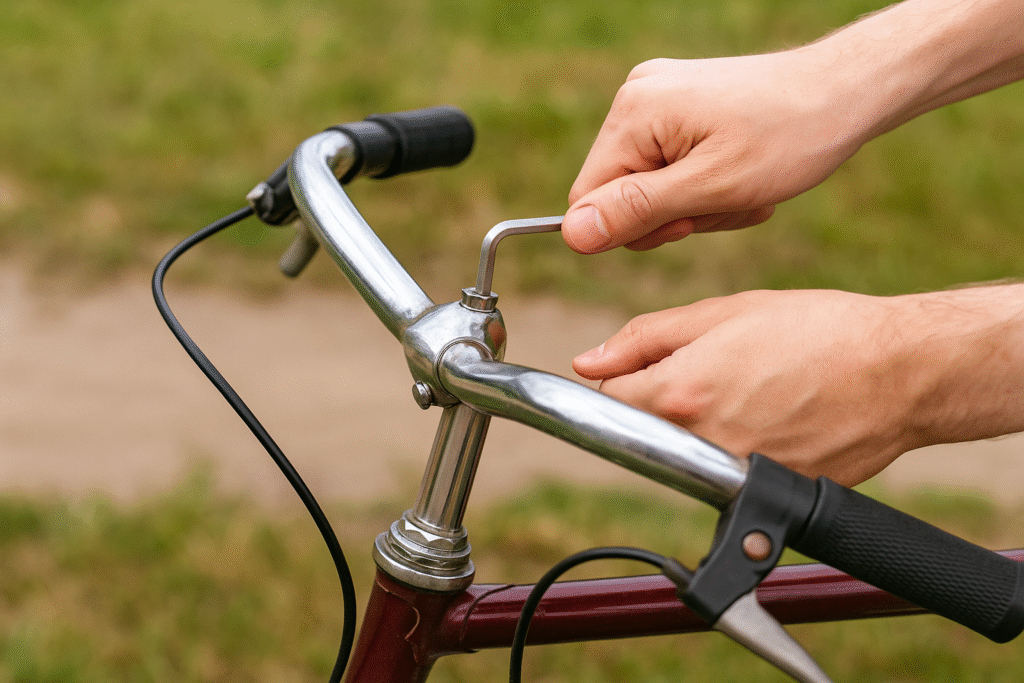
- A quill stem inserts directly into the steerer tube and is secured by an internal wedge tightened by a top bolt.
- To confirm your bike uses a quill stem, check for a single top bolt at the center of the handlebar stem—this indicates adjustability by loosening and raising.
- If your bike has stem bolts on the side and a top cap instead, it likely uses a threadless system, more common in newer models.
- Understanding your bike’s handlebar system is essential before attempting any adjustment or learning how to raise handlebars on old bike setups safely.
- Quill stems generally allow for easier vertical adjustments without needing additional parts like spacers or extenders.
- Properly identifying your stem type will also help when researching how to change handlebars on mountain bike or replacing grips and levers.
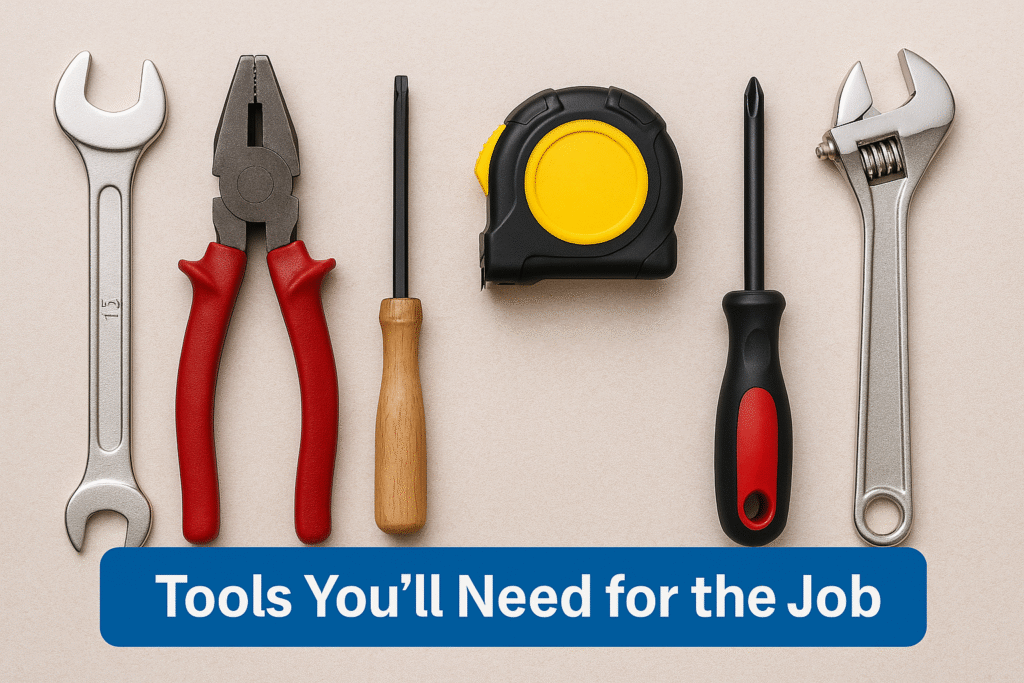
4. Tools You’ll Need for the Job

- Allen wrenches (hex keys): Essential for loosening the stem bolt on most quill stems and modern mountain bike handlebar setups.
- Adjustable wrench or spanner: Often required for older bikes with non-standard bolts or threaded stems.
- Rubber mallet or wooden block: Useful for gently releasing a stuck quill stem without damaging components.
- Grease or anti-seize compound: Prevents corrosion and ensures smooth reinsertion of parts during reassembly.
- Measuring tape or ruler: Helps ensure balanced handlebar height on both sides for even control.
- Cleaning cloth: Keeps components dirt-free before reinstallation, especially during vintage bike restorations.
- Bike stand (optional): Stabilizes the bicycle while performing handlebar height adjustments or learning how to change handlebars on mountain bike.
- Penetrating oil (if needed): Helpful for loosening rusted bolts on older bikes during handlebar adjustment.
5. Step-by-Step Guide: How to Raise Handlebars on an Old Bike
- Confirm that your bike uses a quill stem, common in vintage and older bicycles.
- Use an Allen key or wrench to loosen the bolt on top of the handlebar stem.
- Tap the bolt gently with a rubber mallet or wooden block to free the internal wedge mechanism.
- Slowly raise the handlebar to your desired height, making sure not to exceed the minimum insertion line etched on the stem.
- Realign the handlebars so they are straight and centered with the front wheel.
- Retighten the top bolt securely, ensuring the stem is firmly in place.
- Check for any movement by gently rocking the handlebars side to side.
- Test ride the bike to confirm comfort and control after the handlebar height adjustment.
6. How to Raise Handlebars on a Mountain Bike (if it’s an older model)
- Identify whether your mountain bike uses a quill stem or an early threadless headset, common in older models.
- For quill stems, loosen the top bolt using an Allen key or spanner.
- Adjust the handlebars upward to your preferred height, ensuring the stem remains within the safe insertion depth marked on the shaft.
- Align the bars with the front wheel before retightening the stem bolt securely.
- If your older mountain bike uses a threadless system, you may need to adjust spacers or flip the stem upward.
- Consider using a handlebar height extender if you’ve maxed out height adjustments with existing components.
- Recheck brake and gear cable tension after adjusting the bar height to ensure smooth operation.
- Always test ride to confirm improved posture and control after making adjustments.
7. How to Remove Bike Grips Without Damaging Them

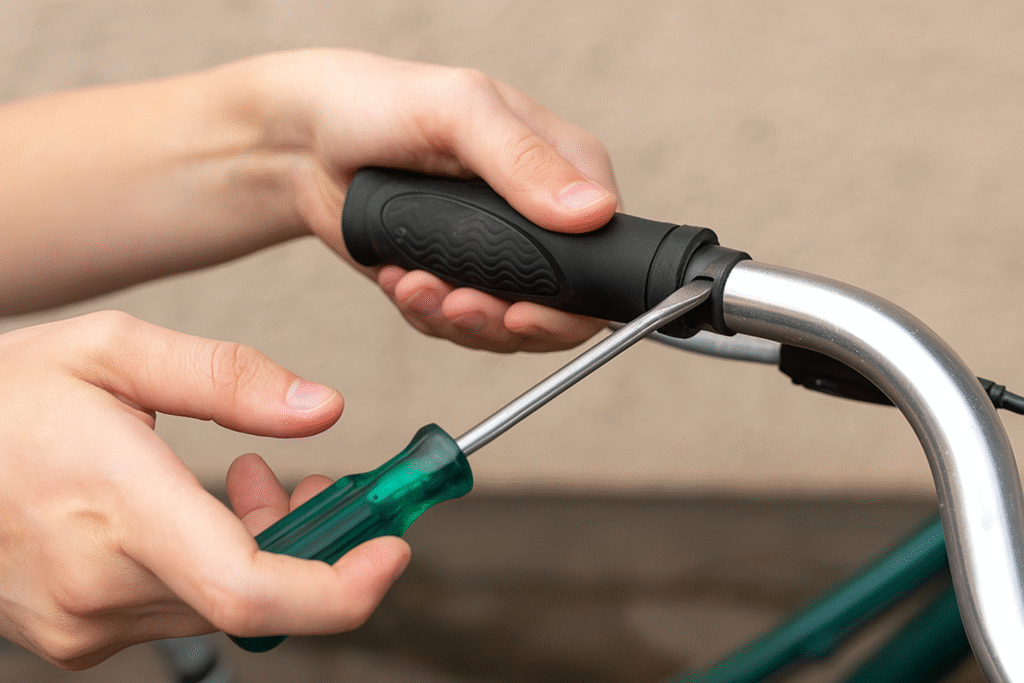
- Begin by inserting a thin, blunt object like a flathead screwdriver between the grip and the handlebar to create a small gap.
- Spray a small amount of rubbing alcohol, water, or grip-specific lubricant into the gap to loosen the adhesive.
- Gently twist the grip back and forth while pulling outward to ease it off the handlebar.
- Avoid using excessive force, which can stretch or tear rubber grips, especially on older or softer materials.
- For mountain bikes with lock-on grips, simply loosen the locking bolts before sliding the grip off.
- Compressed air can also be used to safely push grips off by inserting the nozzle under the edge and applying pressure.
- After removal, clean the handlebar surface before reinstalling or replacing grips to ensure a secure fit.
- This method works well when learning how to change handlebars on a mountain bike or performing routine maintenance on older bicycles.
8. Alternative Solutions for Handlebar Adjustment
- Install a handlebar height extender to gain extra elevation when the existing stem doesn’t allow further adjustment.
- Use a high-rise stem to significantly increase bar height without needing to change the entire cockpit.
- Switch to swept-back handlebars or ergonomic bars that offer a more upright and relaxed riding position.
- Consider adjustable stems that allow on-the-fly angle changes to fine-tune your handlebar height and reach.
- Replace existing handlebars with touring-style bars or comfort bars, ideal for upright posture and longer rides.
- Learn how to change bike handlebars properly to explore better-fitting options suited for your riding style.
- For older bikes, especially with quill stems, use compatible aftermarket solutions designed to improve fit and comfort.
- These alternatives are especially helpful when traditional methods of how to raise handlebars on old bike setups reach their limit.
9. Tips for Reinstalling and Realigning Handlebar Setup
- Always clean the handlebar and stem surfaces before reinstalling to ensure secure contact and prevent slippage.
- Align the handlebars with the front wheel while the bike is on a level surface for accurate positioning.
- Use a torque wrench to tighten all bolts to manufacturer-recommended specifications, especially in carbon or lightweight setups.
- Make sure the brake levers and shifters are positioned within easy reach and angle for comfort and control.
- Double-check the alignment from both the rider’s perspective and head-on to avoid uneven steering response.
- After completing the handlebar assembly, gently rock the bars side to side to ensure there’s no movement.
- If you’ve made changes to the handlebar style or rise, retest cable tension and adjust housing if needed.
- When learning how to change bike handlebars or reinstall grips, ensure all components are snug but not overtightened to prevent damage.
- A short test ride is recommended after realignment to verify comfort, safety, and control.
10. Conclusion
Raising the handlebars on an old bike may seem tricky at first, but with the right tools and a clear understanding of your bike’s handlebar system—like a traditional quill stem—it becomes a manageable and rewarding task. Whether you’re adjusting an old mountain bike or a vintage road model, improving handlebar height can greatly enhance your comfort, reduce physical strain, and support better riding posture.
By following the proper steps and considering alternative adjustment options like handlebar extenders or high-rise stems, you can make your older bike feel like new again. Regular maintenance and thoughtful positioning also ensure long-term safety and performance. Take the time to fine-tune your setup—and enjoy every mile with greater ease and control.
11. FAQs
Q1: How do I know if my old bike uses a quill stem?
Most older bikes feature a quill stem if the bolt is located at the top center of the stem and the stem slides directly into the frame’s steerer tube. Unlike modern threadless systems, quill stems are adjusted by loosening a single bolt.
Q2: What tools do I need to raise handlebars on an old bike?
You’ll typically need an Allen wrench or spanner, a rubber mallet (optional), and a measuring tape. These tools help you loosen the stem bolt, adjust height, and realign the handlebars safely.
Q3: Can I raise the handlebars on an old mountain bike the same way?
Yes, many old mountain bikes also use quill stems. The process to raise the handlebars is nearly identical—loosen the bolt, adjust the height, realign the bars, and re-tighten the stem.
Q4: Is it safe to raise my handlebars above the minimum insertion mark?
No, never raise the handlebars past the minimum insertion line etched on the stem. Doing so compromises safety and could cause the stem to fail while riding.
Q5: What if I need more height than the stem allows?
If you’ve maxed out the available height, consider a handlebar height extender, a high-rise stem, or swept-back handlebars for added comfort without compromising safety.
Q6: Do I need to remove my grips to raise the handlebars?
Not always. However, if you’re replacing the handlebars entirely, you’ll need to know how to remove bike grips without damaging them.
Q7: How frequently should I inspect the alignment of my bike handlebars?
It’s a good idea to inspect your handlebar alignment and bolt tightness every few months, especially after making height adjustments or if you’ve had a recent impact.
