
1. Introduction
However, with the right knowledge and technique, the process becomes quick, safe, and straightforward. Whether you’re transporting your bike, fixing a flat, or performing routine maintenance, understanding how to remove front wheel on bike with disc brakes is an essential skill for any rider.
Unlike rim brakes, disc brakes require extra attention to the rotor and brake pads to prevent misalignment or damage. If your bike features a thru-axle system, you’ll also need to follow specific steps to ensure smooth removal and reinstallation. This guide covers everything from basic tools to expert tips, ensuring you can confidently handle both front and rear wheel removal with disc brakes—including thru-axle systems—with minimal hassle.
Before you begin, always make sure your bike is stable, your workspace is safe, and you’re using the correct tools for your setup. Let’s walk through the steps and avoid common mistakes that could lead to rotor warping or brake pad issues.
Table of Contents
2. Understanding Disc Brake Systems
Disc brakes have become the standard for modern bicycles due to their superior stopping power, reliability in all weather conditions, and minimal rim wear. Whether you’re working on removing your front wheel or upgrading components, understanding how disc brakes function is essential for both safety and performance.
What Are Disc Brakes on a Bike?
Disc brakes use a rotor (disc) attached to the wheel hub and a caliper mounted on the frame or fork. When you squeeze the brake lever, the caliper’s brake pads clamp onto the rotor, creating friction that slows the wheel.
There are two main types of disc brakes:
- Mechanical Disc Brakes: Operated via a standard cable, easier to maintain but may offer less modulation.
- Hydraulic Disc Brakes: Use fluid in a sealed line, delivering stronger braking force with less hand effort and better control.
Pro Tip: Before any wheel removal, always inspect your calipers and rotors to avoid accidental pad compression or contamination.
Why It Matters for Wheel Removal
When learning how to remove the front wheel on a bike with disc brakes, it’s important to understand how the system interacts:
- Rotor Sensitivity: The disc rotor must stay clean and perfectly aligned. Bending or contaminating the rotor can lead to poor braking or loud squealing.
- Pad Compression Risk: If you squeeze the brake lever with the wheel removed, the pads may close, making reinstallation difficult.
- Axle Compatibility: Many disc brake bikes use a thru-axle system, which increases stiffness and brake alignment precision.
Quick Safety Reminders
- Always insert a pad spacer if the wheel will be off for an extended period.
- Avoid laying the bike on the rotor side when removing wheels.
Tools You Might Need
- Allen or Torx wrench (for caliper or axle adjustments)
- Rotor truing tool (if minor warping occurs)
- Clean microfiber cloth and isopropyl alcohol (for cleaning rotors)
Understanding the basics of your disc brake system makes removing and reinstalling your wheels more efficient and safer. Whether you’re dealing with a thru-axle front wheel or preparing to remove a rear bike wheel with disc brakes, this knowledge helps you avoid common issues and maintain optimal performance.
3. Preparing to Remove the Front Wheel
Before you begin removing the front wheel from a bike with disc brakes, proper preparation is crucial for a safe and smooth process. Whether you’re dealing with a thru-axle front wheel or a standard quick-release, a few basic steps can help prevent damage to components and ensure a successful reinstallation.
1. Shift into the Easiest Gear (Optional but Helpful)
Although this step is more relevant when removing the rear wheel, it’s still good practice to shift into the easiest gear before working on your bike. It helps reduce drivetrain tension and makes handling the bike easier overall.
2. Find a Stable Work Area
Place your bike on a clean, level surface, ideally using a bike stand. If you don’t have one, you can carefully flip the bike upside down, resting it on the saddle and handlebars. Ensure there’s enough space to work comfortably around the front wheel.
Tip: Protect your saddle and grips with a towel or cloth to avoid scratches when flipping the bike.
3. Check the Brake System
If you have hydraulic disc brakes, avoid squeezing the brake lever while the wheel is off. This can cause the brake pads to close, making reinstallation difficult.
4. Inspect the Axle Type
Disc brake bikes typically use one of two axle types:
- Thru-Axle: Offers increased stiffness and precise alignment. You’ll need a 5mm or 6mm Allen wrench or a specific axle lever, depending on the model.
- Quick Release Skewer: Common on older bikes or budget models, removed by flipping and loosening the lever.
Knowing your axle system will help you prepare the right tools and avoid confusion during removal.
5. Clean the Axle Area
Wipe down any visible dirt or debris around the axle, hub, and fork dropouts. This prevents contamination of the disc rotor and ensures smooth wheel removal and reinstallation.
6. Secure the Rotor
Take note of how the rotor sits within the brake caliper. It should be centered and free from bends.
By taking a few minutes to properly prepare, you minimize the risk of damaging sensitive components like the rotor or brake pads. These steps ensure that removing and reinstalling the front wheel on a bike with disc brakes goes smoothly, even for beginners.
4. How to Remove Front Wheel on Bike with Disc Brakes (Step-by-Step)
Removing the front wheel on a bike equipped with disc brakes may seem tricky at first, but it’s a straightforward process if done correctly. Whether you’re working with a thru-axle or quick-release system, the following step-by-step guide ensures safety and precision without damaging the brake rotor or axle system.
Step 1: Position the Bike Securely
Place your bike upright using a repair stand, or flip it gently upside down, resting on the saddle and handlebars. Make sure it’s stable to prevent tipping during the removal process.
Tip: Use padding to protect the saddle and handlebar grips from scuffs if resting the bike upside down.
Step 2: Insert a Rotor Spacer (Optional but Recommended)
Before removing the wheel, insert a brake pad spacer between the brake pads if you’re using hydraulic disc brakes. This prevents the pads from closing if the brake lever is accidentally squeezed.
Step 3: Identify Your Axle Type
- Thru-Axle: You’ll need a 5mm or 6mm Allen key, or you may have a lever built into the axle.
- Quick-Release: Simply open the lever and loosen the adjusting nut on the opposite side if needed.
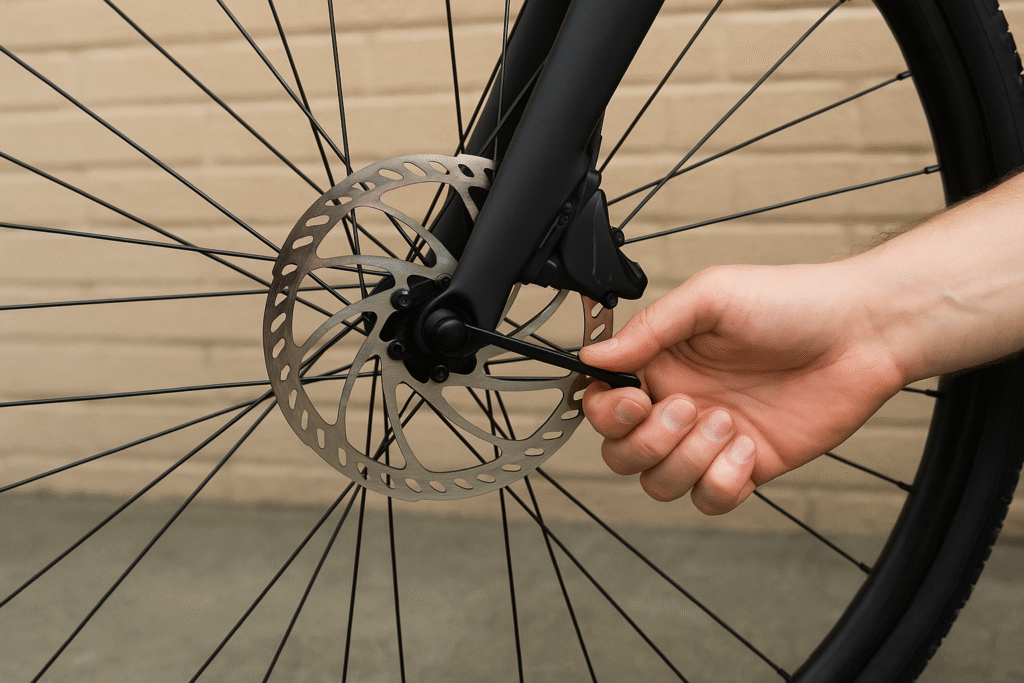
Step 4: Loosen and Remove the Axle
- Thru-Axle: Unscrew the axle by turning counterclockwise. Once fully disengaged, gently slide it out and set it aside.
- Quick-Release: Open the lever, unscrew the nut if tight, and then carefully lift the fork from the hub.
Safety Tip: Avoid bending the disc rotor when removing the wheel. Pull the fork upward while keeping the wheel steady.
Step 5: Gently Remove the Wheel
Hold the wheel from both sides and guide it out of the fork dropouts, making sure the rotor clears the brake caliper smoothly. If it resists, check that the axle is fully disengaged and the brake pads aren’t obstructing the rotor.
Step 6: Set the Wheel Down Carefully
Lay the wheel flat on a clean, dry surface with the rotor facing up to prevent contamination or bending. Never place the rotor side directly on the ground.
✅ Essential Tools You May Need:
- Allen key (usually 5mm or 6mm for thru-axle)
- Brake pad spacer (for hydraulic brakes)
✅ Quick Safety Checks:
- Avoid touching the rotor with your fingers to prevent contamination.
- Double-check rotor clearance when reinstalling.
By following these precise steps, even beginners can confidently remove the front wheel on a bike with disc brakes without causing damage to vital components. It’s a skill every cyclist should learn for easier transport, storage, and maintenance.
5. How to Remove Thru Axle Front Wheel
Removing a thru axle front wheel from a bicycle with disc brakes is a simple but precise task that requires attention to detail. Thru axles provide greater stiffness and alignment compared to quick-release skewers, making them common on modern mountain and road bikes. This guide ensures a safe and clean removal process without damaging the brake system or axle components.
🔧 What You’ll Need:
- Allen key (usually 5mm or 6mm) or the integrated axle lever
- Clean rag or gloves (to handle the wheel and avoid touching the rotor)
Step-by-Step Instructions:
1. Secure Your Bike
Stabilize the bike using a repair stand or by turning it upside down onto a padded surface. Ensure the handlebars and saddle are protected from scratches.
Tip: If you’re working outdoors or in a garage, clear the workspace to avoid contaminating the disc rotor.
2. Use a Pad Spacer (Hydraulic Brakes Only)
If your bike uses hydraulic disc brakes, insert a brake pad spacer to prevent the pads from closing in case the brake lever is accidentally pulled.
3. Locate and Loosen the Thru Axle
- If your thru axle has a built-in lever, flip it open.
- If it’s a bolt-style axle, use the appropriate Allen key and turn it counterclockwise until the axle loosens completely.
Note: Do not force the axle if it resists—check for dirt or corrosion that may need cleaning first.
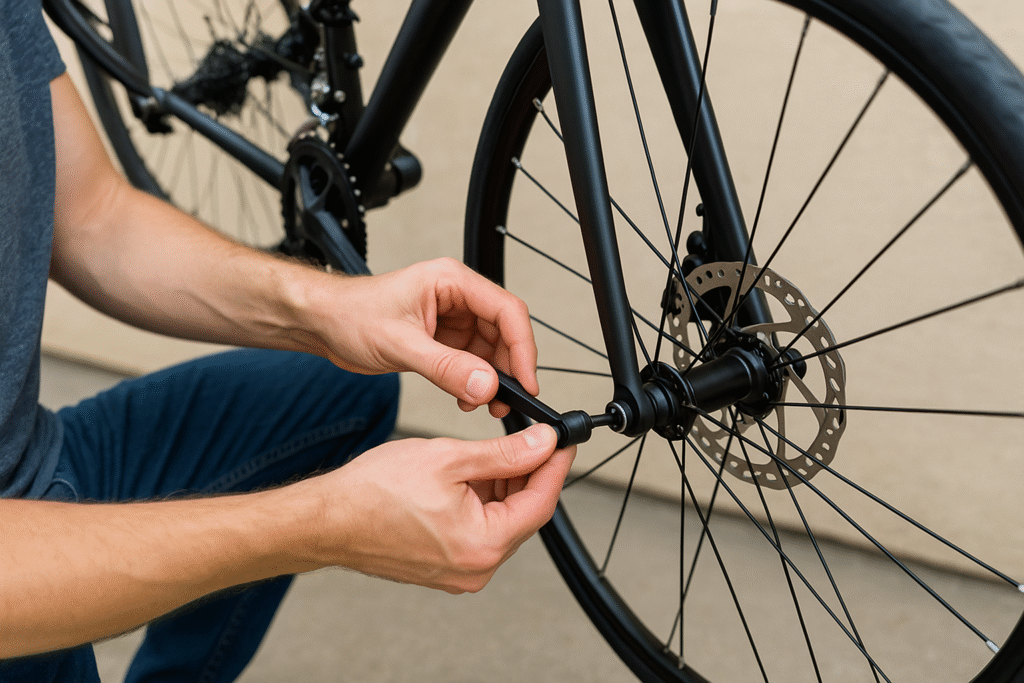
4. Remove the Thru Axle
Slide the axle out carefully while supporting the fork. Once the axle is free, place it aside on a clean surface.
5. Remove the Front Wheel
Gently lower or lift the fork (depending on your bike’s position) while supporting the wheel, ensuring the rotor clears the brake caliper. Avoid bending the rotor during removal.
6. Lay the Wheel Rotor-Up
Place the wheel rotor-side up to prevent contamination or accidental bending. Do not lay the rotor on rough or dirty surfaces.
✅ Quick Safety Reminders:
- Handle the rotor carefully—avoid oils, grease, or fingerprints.
- Check for debris in the dropouts before reinstalling the wheel.
Following these steps ensures a clean and safe dismount, whether you’re packing your bike, repairing a flat, or performing maintenance.
6. How to Remove Rear Bike Wheel with Disc Brakes
Removing a rear bike wheel with disc brakes requires a careful approach to protect both the disc rotor and brake caliper. If your bike has hydraulic disc brakes, it’s important to insert a brake pad spacer into the caliper to prevent the pistons from compressing if the brake lever is accidentally pulled.
To begin wheel removal, open the rear axle. If your bike uses a quick-release skewer, flip open the lever and loosen the nut. For bikes with a thru axle, use either the built-in lever or a hex key to unscrew the axle completely. Once removed, gently pull the rear derailleur backward with one hand while guiding the wheel out with the other. As the wheel comes out, the chain will naturally slip off the cassette.
Be especially careful to avoid contact between the disc rotor and brake pads, as this could affect braking performance. Do not touch the rotor surface with your fingers, as oils can cause contamination. When you’re ready to reinstall the wheel, ensure the rotor aligns correctly between the caliper pads and the chain sits on the correct cog. Insert the axle back through the dropouts and tighten it securely, checking that the wheel spins freely and the brake rotor doesn’t rub.
This method helps you remove a rear bike wheel with disc brakes safely and efficiently, whether you’re dealing with a flat tire, performing maintenance, or transporting your bike.
7. How to Remove Rear Bike Wheel with Thru-Axle
This reduces chain tension, making removal and reinstallation much smoother. Secure your bike upright in a stand or turn it upside down, ensuring it’s stable and won’t tip over during the process.
Next, locate the thru-axle lever. Depending on your setup, it may have a built-in lever or require a hex key, typically 5mm or 6mm. Turn the axle counterclockwise until it’s fully unthreaded from the dropout. Once loose, slide the axle out completely while keeping the wheel in position.
With the axle removed, gently pull back the derailleur cage using one hand to clear space for the cassette. Carefully guide the wheel down and out, ensuring the rotor slides safely between the brake pads without contact. Avoid touching the rotor surface to prevent contamination, especially if you have disc brakes with hydraulic calipers.
For bikes with hydraulic disc brakes, always insert a pad spacer into the caliper once the wheel is off. This prevents accidental brake lever activation, which could cause the pads to close and make wheel reinstallation difficult.
To reinstall the wheel, align the rotor precisely between the brake pads and guide the cassette into the derailleur cage. Push the wheel fully into the dropouts. Reinsert the thru-axle through the frame and hub, tighten it securely, and make sure the axle lever or bolt is fully closed and torqued properly. Spin the wheel to check for any rubbing or misalignment.
Following these steps ensures safe and efficient removal of a rear wheel with a thru-axle, minimizing damage to components and maintaining optimal performance during maintenance or transport.
8. Troubleshooting & Pro Tips
If your thru-axle feels stuck or difficult to unscrew, check for dirt, rust, or grit around the axle threads or dropout area. Apply a small amount of bike-specific lubricant and allow it to sit for a minute before attempting removal again. Avoid forcing the axle, which could strip threads or damage the dropout.
When the wheel won’t drop out smoothly, ensure the brake rotor isn’t caught between misaligned pads or that the derailleur hanger isn’t bent. If needed, gently press the derailleur cage backward to create more space for the cassette.
For thru-axles without a built-in lever, always carry the correct-size Allen key in your saddlebag or tool kit—usually 5mm or 6mm—especially during long rides. This small preparation can prevent major headaches on the trail or road.
After reinstalling a wheel, if you hear rubbing sounds from the disc brake, check that the rotor is centered between the brake pads. Slightly loosening the caliper mounting bolts, realigning the caliper, and then retightening usually resolves minor rubbing issues.
Never activate hydraulic brakes when the wheel is removed unless a pad spacer is inserted. Doing so may compress the pads too tightly, requiring a brake bleed or piston reset.
Pro tip: Before removing a wheel, take a quick photo of your axle orientation and brake hose routing. This helps ensure proper reassembly, especially for bikes with internal routing or tight clearance.
Finally, always torque the thru-axle to the manufacturer’s recommended spec. Over-tightening can damage carbon frames or threads, while under-tightening may compromise wheel security and rider safety.
9. Conclusion
Removing a front or rear bike wheel with disc brakes—especially those equipped with thru-axles—may seem complex at first, but with the right tools and understanding, it becomes a simple and essential maintenance skill. Whether you’re fixing a flat, transporting your bike, or making drivetrain adjustments, knowing how to safely and correctly remove the wheels helps protect your brake components, ensures consistent performance, and prevents costly mistakes.
Always follow proper safety checks: shift into the right gear, release the thru-axle with care, and handle the disc rotor cautiously to avoid bending or contamination. Keeping a clean workspace, having the correct Allen key (if needed), and re-torquing the axle to spec are key steps to safe reinstallation.
With practice and attention to detail, even beginners can confidently manage wheel removal on bikes with disc brakes and thru-axles—whether it’s at home, on the trail, or during travel.
10. FAQs
1. Do I need to remove the brake caliper to take off a wheel with disc brakes?
No, in most cases you don’t need to remove the brake caliper. Simply ensure the brake pads are fully retracted and avoid squeezing the brake lever when the wheel is off to prevent pad misalignment.
2. How do I prevent disc rotor warping during wheel removal?
Always handle the rotor by its edge and avoid placing the bike rotor-side down. Consider using rotor protectors or laying the wheel on a clean, padded surface.
3. Can I remove a thru-axle wheel without tools?
Most thru-axles have integrated levers and can be removed without tools. However, some require a 6mm or 5mm Allen key. Check your bike’s specifications before attempting removal.
4. Why won’t my rear wheel come out even after loosening the thru-axle?
Ensure the derailleur is fully relaxed and the chain is on the smallest cog.
5. Is it safe to transport my bike without wheels attached?
Yes, but always protect the fork dropouts, rear derailleur hanger, and disc rotors. Use dummy axles, fork spacers, or dropout protectors to maintain frame alignment.
6. What should I do if my disc brake pads close after removing the wheel?
Insert a clean, flat spacer (like a pad spreader or plastic tire lever) between the pads and gently push them back apart. Never force the rotor back in—this can damage the pads or pistons