
Table of Contents
1. Introduction
Removing the rear wheel on a mountain bike is a fundamental maintenance skill that every rider should learn. Whether you’re fixing a flat, cleaning the drivetrain, or preparing your bike for transport, understanding the correct removal method ensures efficiency and prevents damage to essential components.
Mountain bikes typically use either a quick release or a thru axle system, and each requires a slightly different approach. Knowing which system your bike uses is the first step in performing a safe and successful wheel removal.
This guide explains how to remove rear wheel on mountain bike, covering both quick release and disc brake thru axle setups. It includes tools you’ll need, step-by-step instructions, common mistakes to avoid, and expert tips to help you handle the process with confidence.
By mastering this basic yet crucial skill, you’ll improve your bike maintenance routine and ensure smoother rides every time.
2. Tools You’ll Need Before You Start
To ensure a safe, efficient, and hassle-free process, it’s essential to gather all the required tools before removing the rear wheel from your mountain bike. Having the right equipment on hand not only prevents damage to your bike but also saves time during maintenance.
A sturdy bike repair stand or a stable surface to keep your bicycle upright is essential. This provides better control and easier access to the rear wheel. For bikes equipped with a thru axle, you’ll need a properly sized hex wrench or Allen key. In contrast, quick release bike wheels may not require tools, but it’s crucial to check that the release mechanism is functioning correctly.
Wearing gloves can help maintain grip and keep your hands clean while working around greasy components.
For bikes with disc brakes, a brake pad spacer is a helpful addition, especially if you plan to leave the wheel off for a while. In cases where extended maintenance is expected, a chain keeper or bungee cord can hold the chain in place and prevent tension loss.
Lastly, a torque wrench is a valuable tool when reinstalling the rear axle, particularly for thru axle systems, to ensure all components are tightened to manufacturer specifications.
Preparing these tools in advance will streamline the process and help avoid common issues related to removing rear bike wheels with quick release or thru axle systems.
3. Understanding Rear Wheel Types: Quick Release vs Thru Axle
When learning how to remove the rear wheel on a mountain bike, it’s essential to understand the two most common axle systems: quick release and thru axle. Each system affects how the wheel is removed and reinstalled, and recognizing the difference helps prevent mistakes during maintenance or repairs.
Quick release systems are widely used on older mountain bikes and some entry-level models. It’s fast and convenient, but it requires precise alignment when reinstalling, especially if your bike has disc brakes. When working with a quick release bike wheel with disc brakes, extra care must be taken to avoid rotor misalignment.
Thru axle systems, on the other hand, are found on most modern mountain bikes, particularly those designed for rugged terrain and heavier loads. Removing a rear wheel with a thru axle typically requires an Allen key or a special lever, depending on the bike model.
Identifying your axle type before starting any work is crucial. It determines the tools you’ll need and the proper technique for safely removing the rear wheel. Whether you’re dealing with removing a rear bike wheel with quick release or navigating a thru axle setup, understanding these differences ensures a smoother, more efficient maintenance experience.
4. Step-by-Step Guide: Removing Rear Bike Wheel with Quick Release
Removing the rear wheel on a mountain bike equipped with a quick release system is straightforward if done correctly. This step-by-step guide ensures the process is efficient and safe, especially when dealing with disc brakes or derailleur systems.
First, shift the chain onto the smallest cog on the rear cassette. This creates slack in the chain and makes it easier to remove the wheel. Next, place your bike on a repair stand or flip it upside down for stability.
If your bike has disc brakes, take care not to touch the rotor, as oils from your hands can affect braking performance. Also, avoid pulling the brake lever after the wheel is removed to prevent the calipers from closing.
Once the lever is open, hold the derailleur back slightly to create clearance, then gently slide the wheel downward and out of the frame.
After removal, set the wheel aside carefully, especially if the bike has disc brakes. Place the bike in a secure position to prevent damage to the drivetrain or brake components.
This method is effective for removing rear bike wheels with quick release, particularly on mountain bikes with disc brakes. Practicing this technique improves confidence during trail repairs or routine maintenance.
5. How to Remove Rear Wheel with Thru Axle (Disc Brake Mountain Bikes)
Taking off the rear wheel on a disc brake mountain bike with a thru axle involves a few additional steps than a quick release setup, but the procedure remains straightforward with proper guidance. with the right approach. Thru axles offer added stiffness and security, making them a common feature on modern trail and enduro bikes.
Start by shifting the chain onto the smallest rear cog. This reduces chain tension and allows for easier removal.
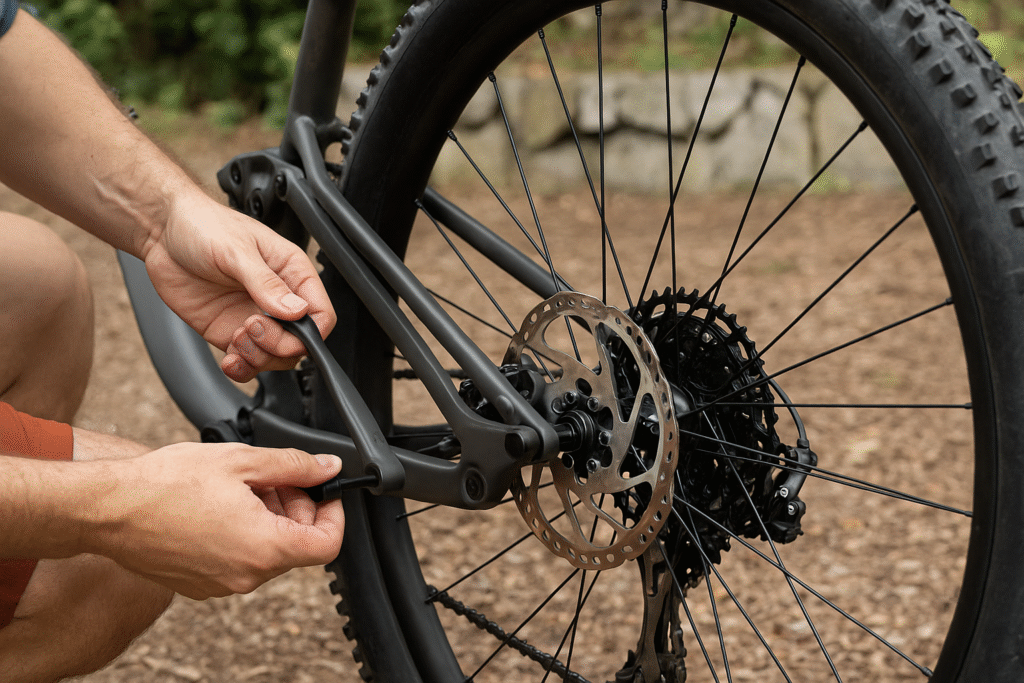
Locate the thru axle on the rear dropout. Depending on your bike’s design, you may need an Allen key or a tool-free lever to unscrew the axle. Turn it counterclockwise to loosen and remove it completely from the frame.
Be cautious around the disc brake rotor, and avoid squeezing the brake lever while the wheel is off, as this can cause the caliper pads to close.
If the bike will be without a wheel for an extended time, insert a brake pad spacer to protect the hydraulic system. Set the wheel aside with the disc rotor facing upward to prevent contamination or damage.
This method is especially important for mountain bikes with disc brakes and thru axle systems, where precision and care help preserve brake alignment and drivetrain function. Understanding this process builds confidence and ensures safer, more effective maintenance.
6. Common Issues and Fixes
Knowing how to identify and fix them ensures smoother maintenance and avoids damage to key components.
One frequent issue is the wheel getting stuck in the dropout. This often happens when the derailleur is not pulled back far enough or the chain is under tension. Shifting to the smallest cog and gently pulling the derailleur can resolve this.
For bikes with disc brakes, brake rotor alignment can be a challenge during reinstallation. If the rotor rubs against the pads, it may be due to misalignment or a bent rotor. Re-seat the wheel carefully and check that the thru axle or quick release is fully tightened to avoid rotor contact.
Another common problem occurs when riders accidentally squeeze the brake lever after removing the wheel. This causes the caliper pads to close, making wheel reinstallation difficult. Use a pad spacer to hold the calipers open or gently reset the pads with a plastic tire lever.
Chain drop or derailleur misplacement can also complicate removal. Ensure the chain stays on the smallest cog and guide it carefully around the cassette when reinstalling the wheel. Avoid forcing the wheel into position, especially with a quick release bike wheel with disc brakes, to prevent damage to the frame or axle.
Addressing these issues quickly and correctly helps maintain drivetrain performance and prevents unnecessary wear, especially when removing rear bike wheels for maintenance or repair.
7. Reinstalling the Rear Wheel Properly
Whether your bike uses a quick release or a thru axle, attention to detail is essential for safe riding.
Begin by shifting the chain onto the smallest rear cog. This helps guide the wheel into place with minimal resistance. For bikes with disc brakes, ensure the rotor aligns correctly between the caliper pads—misalignment can lead to rubbing or brake failure.
If you’re using a quick release system, insert the axle fully into the dropouts and close the lever firmly without forcing it. The lever should feel tight but manageable. For bikes with a thru axle, slide the axle through the hub and frame, then tighten it to the manufacturer’s recommended torque using an Allen key or hand lever.
Before lowering the bike, spin the rear wheel to check for smooth rotation and proper alignment. If you notice any rubbing, noise, or hesitation in the drivetrain, inspect the derailleur position and rotor spacing again.
A properly reinstalled rear wheel ensures stability, smooth shifting, and effective braking. This step is especially important for riders working with quick release bike wheels with disc brakes or thru axle systems, where precision matters for performance and safety.
8. Pro Tips for MTB Riders
Mastering how to remove and reinstall the rear wheel on a mountain bike is a valuable skill, especially for trail riders who may need to perform quick repairs in remote locations. These expert tips can help improve your efficiency and avoid common mistakes.
Always practice wheel removal and installation at home before attempting it on the trail. Familiarity with your bike’s quick release or thru axle system can save time and prevent errors when you need to act quickly. For bikes with disc brakes, carry a brake pad spacer in your repair kit to prevent the calipers from closing accidentally if the brake lever is pressed while the wheel is off.
It’s also wise to carry a multi-tool, a spare tube, tire levers, and a small hand pump on every ride. These essentials can make a big difference during unexpected flat tires or mechanical issues.
Before reinstalling the wheel, always ensure the chain is on the smallest cog, and confirm that the derailleur is properly positioned. This helps the cassette seat correctly and prevents misalignment.
If you’re dealing with quick release bike wheels with disc brakes, double-check the lever tightness and rotor alignment before riding. For thru axle setups, use a torque wrench if possible to apply the correct tension, especially after removing the rear wheel for maintenance.
Regular inspection of the dropout area, axle threads, and rotor can help catch wear or damage early. Maintaining clean contact points improves performance and prolongs the life of your bike’s components.
These tips support a more confident and efficient approach to removing and reinstalling rear mountain bike wheels, whether at home or on the trail.
9. Conclusion
Knowing how to remove the rear wheel on a mountain bike is an essential skill for both routine maintenance and emergency trail repairs. Whether you’re working with a quick release system or a thru axle, understanding the correct tools, techniques, and common challenges ensures a smoother, safer experience.
By following a structured approach—from identifying your axle type to reinstalling the wheel properly—you reduce the risk of damaging drivetrain components or brake systems. This is particularly important when handling quick release bike wheels with disc brakes or modern mountain bikes with thru axles.
With the right preparation and a bit of practice, riders can confidently perform this task at home or in the field, improving both self-reliance and bike performance. Regular maintenance and careful handling of your wheel system contribute to a safer and more enjoyable riding experience.
10. FAQs
Q1: Do I need tools to remove a rear bike wheel with a quick release?
No, most quick release systems do not require tools. Simply open the lever, loosen the nut if needed, and slide the wheel out. However, care should be taken if your bike has disc brakes.
Q2: How can I tell if my mountain bike has a quick release or a thru axle?
A quick release system has a lever that can be opened by hand, while a thru axle typically requires a hex key or tool and passes through the frame and hub as a single solid axle.
Q3: What should I do if the rear wheel won’t come out easily?
Make sure the chain is shifted to the smallest cog and the derailleur is pulled back. If it’s still stuck, check for tension in the axle or any obstruction from the derailleur hanger.
Q4: Can I damage my disc brakes while removing the rear wheel?
Yes, if you accidentally pull the brake lever while the wheel is off, the pads can close and make reinstallation difficult. Use a pad spacer to prevent this and avoid touching the rotor.
Q5: Is it necessary to reposition the derailleur when putting the rear wheel back on?
Not necessarily. If the wheel is properly aligned and the chain is on the smallest cog, the derailleur will guide itself. Ensure the axle or quick release is secured to avoid shifting issues.
Q6: Is it different to remove a rear wheel on an e-MTB?
Yes, electric mountain bikes may have motor connections or internal wiring near the rear hub. Always consult the manufacturer’s manual before removing the wheel on an e-bike.
Q7: How often should I remove and clean my rear wheel?
For regular riders, inspecting and cleaning the rear wheel every few weeks or after muddy rides is ideal. It ensures drivetrain efficiency and helps identify early signs of wear or damage.