
1. Introduction
Knowing how to install bicycle rack on car is essential for riders who want a convenient way to carry their bikes safely. Whether you’re planning a weekend ride or a long road trip, understanding the basics of how to install a bike rack on an SUV or hatchback ensures both your bike and vehicle stay protected.
From Allen bike rack installations to roof and hitch-mounted systems, choosing the right rack and installing it correctly can make all the difference. This guide covers step-by-step instructions, specific tips for different vehicle types, and answers to common questions to help you transport your bike confidently and securely.
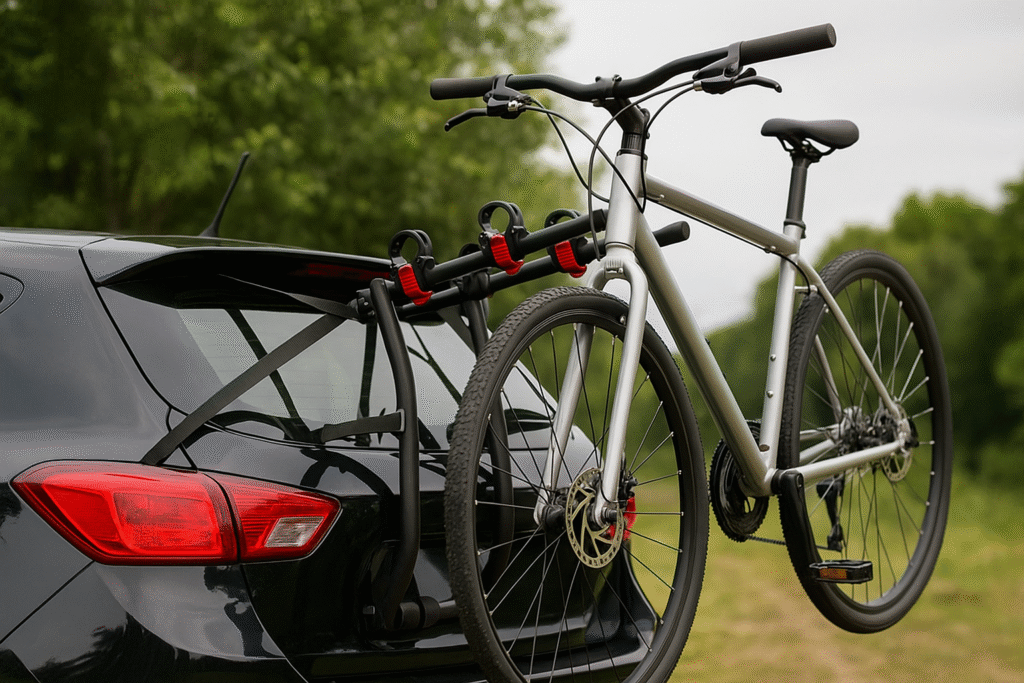
Table of Contents
2. Types of Bicycle Racks for Cars
- Choosing the right bike rack depends on your vehicle type, the number of bikes, and how frequently you transport them. Below are the most common types of bicycle racks used for cars, SUVs, and hatchbacks:
- 1. Trunk-Mounted Racks
- These racks attach to the trunk or hatch of a car using adjustable straps. They are affordable, easy to install, and compatible with most sedans and hatchbacks. This type is popular for those learning how to install a bicycle rack on a car without a hitch.
- 2. Hitch-Mounted Racks
- Hitch racks slide into the receiver hitch at the rear of the vehicle. They offer strong support and are ideal for carrying multiple bikes. Models like the Allen 542RR are known for easy installation and secure transport, especially on SUVs.
- 3. Roof-Mounted Racks
- Roof racks require crossbars and secure bikes on top of the vehicle. They provide a clear rear view but can affect fuel efficiency and require lifting the bike higher. While not ideal for all, they are useful for long-distance travel and sporty cars.
- 4. Spare-Tire-Mounted Racks
- Designed for SUVs with rear-mounted spare tires, these racks attach directly to the spare. They offer convenience without requiring a hitch or trunk access, making them a good option for off-road vehicles.
- 5. Platform or Tray-Style Racks
- These sit lower to the ground and support the bike wheels directly. They are stable and easy to load, especially for heavier bikes. Platform racks are common in Allen bike rack installation for SUVs and hatchbacks.
- Each rack type offers unique benefits based on your vehicle and riding needs. Selecting the right style is key before you learn how to install a bike rack on an SUV or hatchback safely and effectively.
3. Tools and Preparations Before Installation
- Before starting the process of installing a bicycle rack on your car, it’s essential to prepare both your vehicle and the necessary equipment to ensure a secure and damage-free setup. Whether you’re using a trunk-mounted rack or setting up an Allen bike rack on an SUV, proper preparation reduces installation time and enhances safety.
- Check the Compatibility of the Rack
- Make sure the bike rack you choose is compatible with your specific vehicle type, such as a sedan, SUV, or hatchback. Refer to product-specific guidelines such as Allen 3 bike rack instructions for best results.
- Clean the Installation Area
- Wipe down the trunk, hatch, or hitch area where the rack will be mounted. This prevents scratches and improves the grip of straps or mounts.
- Inspect the Rack and Its Components
- Lay out all parts including straps, clips, bolts, or pins. For models like the Allen 542RR, double-check that nothing is missing or damaged before beginning.
- Keep Basic Tools Handy (If Needed)
- Some racks require tools like a wrench or screwdriver, especially for hitch-mounted systems. While Allen bike racks often come pre-assembled, having tools nearby is useful during adjustments.
- Read the Manufacturer’s Manual
- Always review the user manual that comes with your rack. Following specific steps, such as those in Allen 102DN installation guides, helps avoid mistakes during setup.
- Proper preparation ensures a smooth and secure installation process, whether you’re learning how to install a bicycle rack on a car or mounting one on an SUV or hatchback.
4. Step-by-Step: How to Install Bicycle Rack on Car (General Guide)
- Step-by-Step: How to Install Bicycle Rack on Car (General Guide)
- Installing a bicycle rack properly is essential for safe transport and protecting both your car and your bike. Whether you’re mounting a basic trunk rack or using an advanced system like an Allen 3 bike rack, the following steps will help you get started.
- 1. Position the Rack on the Car
- Ensure that the contact points rest on solid, flat surfaces.
- 2. Attach the Straps or Mounts Securely
- Most racks include top, bottom, and side straps. Loop each strap around the designated edges of the car and tighten evenly to prevent the rack from shifting during travel. If you’re learning how to install bike rack on SUV models, make sure straps are clear of rear wipers or sensors.
- 3. Adjust the Rack Arms
- Set the carrying arms at the correct angle for your bicycle. They should be level and spaced to support your bike’s frame without strain.
- 4. Place the Bike on the Rack
- Lift the bike and rest its frame on the arms. Use included straps or cradles to secure it firmly. Make sure the tires don’t touch the car’s surface to avoid scratches.
- 5. Check Stability and Clearance
- Before driving, tug gently on the bike and rack to ensure everything is secure. Check rear visibility and license plate clearance. Following this process ensures safety whether you’re installing a basic model or completing an Allen bike rack installation.
- 6. Test Drive for a Short Distance
- Drive slowly and listen for movement or rattling. If any changes are necessary, stop in a safe spot to readjust the straps or reposition the bicycle securely.
- Mastering how to install bicycle rack on car correctly will not only protect your equipment but also make your cycling trips easier and stress-free.
5. How to Install Bike Rack on SUV (Specific Tips)
- Installing a bike rack on an SUV requires a few specific considerations due to the height, tailgate design, and rear window structure. Whether you’re using a trunk-mounted system or completing an Allen bike rack installation, following SUV-specific tips ensures safety and stability.
- Choose a Rack Designed for SUVs
- Options like the Allen 542RR or Allen 102DN are popular for their compatibility with SUV frames and hitch systems.
- Position the Rack at the Correct Height
- Due to the higher rear end of most SUVs, position the rack so that it sits securely without blocking the license plate or rear lights. Ensure the rack does not interfere with backup cameras or rear wipers.
- Use All Mounting Straps and Tighten Evenly
- Secure the top, bottom, and side straps carefully. On SUVs with larger tailgates or curved designs, strap alignment is crucial to prevent shifting during transport.
- Support the Rack Before Loading Bikes
- Because of the added height, it’s best to stabilize the rack or get assistance when lifting bikes into place. This reduces the risk of scratching the vehicle or improperly mounting the bike.
- Check for Spare Tire Clearance
- If your SUV has a rear-mounted spare tire, choose a spare-tire-compatible rack or a hitch-mounted option that clears the tire space.
- Verify Visibility and Stability
- After installation, check that the bike rack does not obstruct your view through the rear window. Tug gently on the rack to confirm it’s tightly secured before placing bikes.
- By following these SUV-specific tips, you’ll master how to install a bike rack on SUV vehicles effectively—making your trips safer and more convenient.
6. Allen Bike Rack Installation for Hatchback Cars
- Installing an Allen bike rack on a hatchback requires precise setup to ensure a secure fit and prevent damage to the vehicle. Hatchback designs often have curved glass and limited mounting space, so proper alignment is essential for safe transport.
- Choose a Hatchback-Compatible Allen Rack
- Models like the Allen 102DN or Allen 542RR are commonly recommended for hatchbacks due to their lightweight design and adjustable straps. Always check the manufacturer’s compatibility chart before purchase.
- Position the Rack Below the Rear Window
- Place the upper feet of the rack just below the rear windshield, ensuring the padding makes full contact with the vehicle’s surface. Avoid resting the rack directly on glass.
- Secure All Straps Tightly
- Attach the top, side, and bottom straps to the designated edges of the hatch. Tighten them evenly to prevent rack movement while driving. Follow the Allen 3 bike rack instructions closely for safe setup.
- Check Strap Angles and Pressure Points
- Make sure no strap passes over the rear wiper or obstructs the license plate. Strap tension should be firm but not excessive, as too much pressure can dent lightweight hatch panels.
- Load Bikes Carefully to Avoid Rear Window Contact
- When placing bikes on the rack, ensure the tires and frames are clear of the hatch glass. Use the built-in cradles or straps to secure each bike firmly.
- Following these steps ensures a stable Allen bike rack installation on a hatchback, providing a safe and efficient way to transport bikes without compromising the vehicle’s structure or visibility.
7. Allen 542RR & Allen 102DN Installation Guide
- Allen 542RR & Allen 102DN Installation Guide
- The Allen 542RR and 102DN are two of the most widely used bike racks for cars, SUVs, and hatchbacks. Both offer simple, tool-free installation, making them ideal for riders learning how to install bicycle rack on car for the first time.
- 1. Unfold and Prep the Rack
- Start by unfolding the rack into its open position. Ensure the arms and feet are properly locked into place as per the user manual. Both Allen 542RR and 102DN come fully assembled out of the box.
- 2. Position the Rack on the Vehicle
- For sedans or hatchbacks, rest the upper pads against the rear window or trunk. For SUVs, align the rack so it sits below the rear wiper and does not block the license plate or tail lights.
- 3. Attach All Straps Securely
- Use the top straps first, hooking them to the top edge of the trunk or hatch. Follow with the side and bottom straps. Tighten each one evenly to prevent the rack from shifting during the ride.
- 4. Load the Bikes Correctly
- Place your bicycles onto the support arms and secure them using the integrated straps or cradles. Make sure bikes are balanced and do not touch the car’s surface.
- 5. Perform a Final Safety Check
- Review the Allen 3 bike rack instructions included with your model for any specific guidelines.
- Whether you’re mounting it on a sedan, hatchback, or SUV, following these steps ensures a proper Allen bike rack installation and a safe ride every time.
8. How to Remove Allen Bike Rack from Hitch
- Removing an Allen bike rack from a hitch is a quick process, but it should be done carefully to protect both the rack and your vehicle. Whether you’ve just completed a long trip or need to store the rack, proper removal helps maintain its lifespan and performance.
- Unload the Bikes First
- Before removing the rack, take off all bicycles to reduce weight and prevent imbalance. Secure the arms or fold them down if your model allows.
- Loosen the Hitch Bolt or Pin
- Locate the securing bolt or hitch pin at the base of the rack. Use the appropriate tool (usually a wrench or Allen key) to loosen the bolt. Some Allen 542RR models use a threaded hitch pin for added stability.
- Pull the Rack Straight Out
- Once the bolt or pin is removed, grip the rack firmly and slide it straight out of the hitch receiver. If there’s any resistance, wiggle it gently side-to-side rather than using force.
- Fold and Store the Rack
- Most Allen hitch racks fold flat for compact storage. Clean off any dirt or debris before placing it in your trunk or garage.
- Inspect Hitch and Rack for Wear
- After removal, check for any signs of wear or rust. Apply light lubricant if needed to keep parts functioning smoothly for future Allen bike rack installations.
- Knowing how to remove an Allen bike rack from a hitch safely is just as important as knowing how to install a bicycle rack on a car, ensuring both security and convenience after each ride.
9. Conclusion
Learning how to install a bicycle rack on a car is a valuable skill for any cyclist who wants convenience and flexibility when transporting their bike. Whether you’re using a standard trunk-mounted rack, installing an Allen bike rack on an SUV, or detaching a hitch-mounted system, proper setup and safety checks are essential for secure travel.
By choosing the right rack for your vehicle type—be it a sedan, hatchback, or SUV—and following the correct installation steps, you ensure your bike remains stable and your car protected. Using well-known options like the Allen 542RR or 102DN makes the process easier, especially with model-specific instructions.
With the right preparation and care, a properly installed bike rack enhances every ride, whether you’re commuting, heading to the trails, or planning a long road trip.
10. FAQs
Q1. Is it possible to mount a bicycle rack on all types of vehicles?
Most bicycle racks are designed to fit a variety of vehicles, including sedans, hatchbacks, and SUVs. Make sure to select a bike rack that matches your vehicle’s design and specifications before starting the installation process.
Q2. What is the easiest bike rack to install on an SUV?
Trunk-mounted or hitch-mounted racks like the Allen 542RR are among the easiest to install on SUVs. They come pre-assembled and require minimal tools, making them ideal for those learning how to install a bike rack on SUV.
Q3. Do Allen bike racks require tools for installation?
Most Allen bike rack installations do not require tools, as they come with adjustable straps or quick-release pins. However, some hitch models may need a wrench to secure the bolt.
Q4. Will a bike rack damage my car’s paint or rear window?
Always clean the contact points and ensure padding is in place. Avoid placing pressure directly on the rear windshield, especially with hatchback cars.
Q5. How do I remove an Allen bike rack from a hitch?
To remove an Allen rack from a hitch, unload the bikes, loosen the securing bolt or pin, and gently pull the rack straight out of the receiver. This process is simple and safe when done properly.
Q6. Is it safe to drive on the highway with a bike rack attached?
Yes, as long as the rack and bikes are securely fastened. Always double-check all straps and connections before long drives to prevent shifting during high speeds.