
Introduction
Giving your motorcycle a fresh new look doesn’t always require an expensive professional paint job. With the right tools, proper preparation, and a bit of patience, you can completely transform your bike at home. If you’ve been searching for how to paint a motorcycle with spray cans, you’re in the right place.
Spray can painting is one of the most affordable and beginner-friendly ways to customize your motorcycle. It allows you to experiment with colors, finishes, and styles without investing in costly equipment like spray guns or compressors.
In this detailed guide, you’ll learn everything from preparation and sanding to painting techniques and finishing touches. Whether you’re a beginner or a DIY enthusiast, this article will help you achieve a smooth, professional-looking finish using simple aerosol spray cans.
Why Choose Spray Cans for Motorcycle Painting?
Before jumping into the process, let’s understand why spray cans are a popular choice.
1. Cost-Effective Solution
Spray cans offer a budget-friendly alternative.
2. Beginner-Friendly
Anyone can learn basic spray painting techniques.
3. No Heavy Equipment Required
Unlike compressor-based systems, spray cans are portable and easy to use.
4. Great for Customization
From matte black to glossy finishes, spray cans give you creative freedom.
Tools and Materials You’ll Need
Before you begin, gather everything you need:
- Spray paint (base color)
- Primer
- Clear coat
- Sandpaper (120, 400, 800, 1500 grit)
- Masking tape and plastic sheets
- Cleaning solution or degreaser
- Microfiber cloth
- Safety gear (mask, gloves, goggles)
Optional:
- Paint remover (if old paint is damaged)
How to Prep a Motorcycle for Spray Paint (Most Important Step)
this step can ruin your final result.
2. Remove or Mask Parts
Take off removable parts like:
- Fuel tank
- Fairings
- Side panels
Or cover areas you don’t want painted using masking tape.
3. Strip Old Paint (If Needed)
If the old paint is chipped or uneven, use a paint remover or sand it down.
Sanding Motorcycle Before Painting
Sanding creates a smooth surface for paint to stick properly.
Why Sanding Matters
- Removes imperfections
- Improves paint adhesion
- Ensures a professional finish
Sanding Process
- Start with 120–220 grit to remove old paint
- Use 400 grit to smooth the surface
- Finish with 800 grit for a fine texture
👉 Always sand evenly and avoid deep scratches.
Step-by-Step: How to Paint a Motorcycle with Spray Cans
Now comes the exciting part—painting your bike.
Step 1: Apply Primer
Primer helps paint stick and improves durability.
- Shake the can well
- Hold 8–12 inches away
- Apply thin, even coats
👉 Apply 2–3 coats for best results.
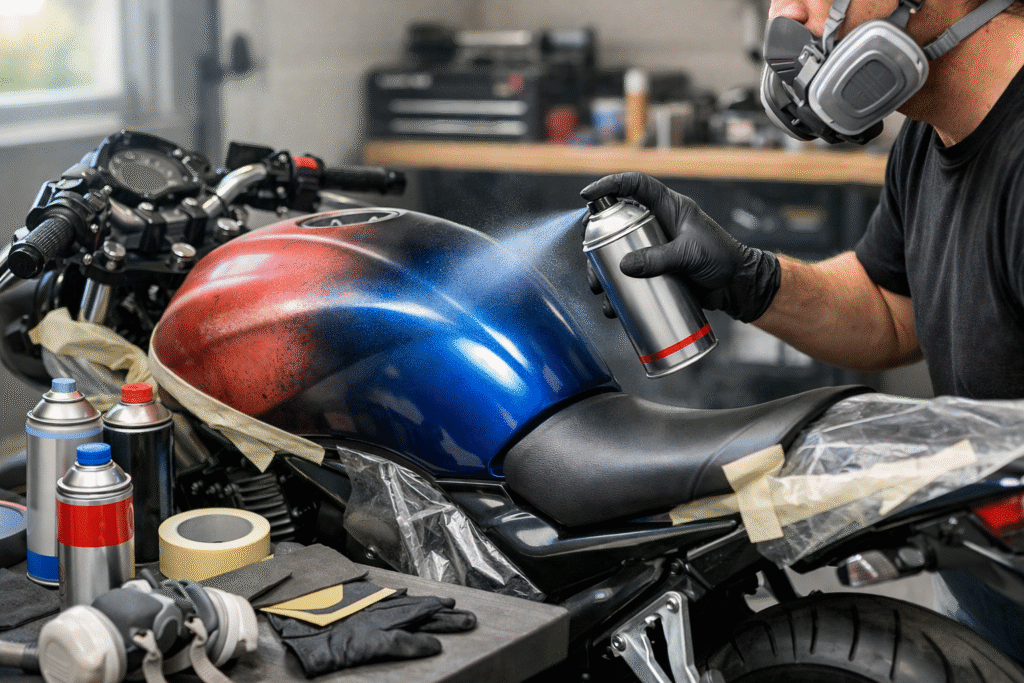
Step 2: Start Spray Painting
This is where your color comes to life.
Spray Painting Techniques for Beginners
- Keep a consistent distance
- Use smooth, sweeping motions
- Start spraying before reaching the surface
- Avoid staying in one spot
👉 Apply multiple thin coats instead of one thick coat.
Step 3: Apply Multiple Coats
- Wait 10–20 minutes between coats
- Apply 3–5 coats depending on coverage
- Check for even color distribution
Step 4: Add Clear Coat
Clear coat protects your paint and adds shine.
- Apply 2–3 coats
- Use the same spraying technique
- Allow proper drying time
Spray Painting Techniques for Beginners
Mastering a few techniques can make a huge difference.
- Always keep the spray moving
- Overlap each pass slightly
- Avoid spraying too close
- Practice on scrap material first
👉 These simple tips can prevent drips and uneven finishes.
Spray Cans vs Compressor Spray Painting
You may wonder how spray cans compare to professional tools.
Spray Cans
- Easy to use
- Affordable
- Perfect for beginners
Compressor Spray Guns
- More precise
- Better for large projects
- Requires equipment like:
- Mini spray gun with compressor
- Portable air compressor
👉 For beginners, spray cans are the best starting point.
How Many Aerosol Cans Are Needed to Paint a Motorcycle?
The number of cans depends on several factors:
- Bike size
- Number of coats
- Color type
Average Estimate
- Primer: 2–3 cans
- Color: 3–5 cans
- Clear coat: 2–3 cans
👉 Always buy extra to avoid running out mid-project.
Motorcycle Paint Drying Time (Spray Cans)
Allowing sufficient drying time is essential to achieve a smooth and flawless finish.
Typical Drying Times
- Touch dry: 20–30 minutes
- Recoat time: 1–2 hours
- Fully cured: 24–48 hours
Factors Affecting Drying
- Temperature
- Humidity
- Ventilation
👉 Work in a dry, dust-free environment.
How Long Does Spray Paint Last on a Motorcycle?
A properly done spray paint job can last 2–5 years.
Factors That Affect Durability
- Paint quality
- Surface preparation
- Weather exposure
- Maintenance
Tips to Make It Last Longer
- Wash regularly
- Avoid harsh chemicals
- Apply wax for protection
Common Mistakes to Avoid
Avoid these beginner mistakes:
Skipping surface preparation
Applying thick coats
Painting in dusty or windy areas
Not allowing proper drying time
Using low-quality paint
👉 These mistakes can ruin your finish.
Pro Tips for a Professional Finish
Want your bike to look like it was painted by a pro? Follow these tips:
- Use high-quality spray paint
- Sand lightly between coats
- Maintain a steady hand
- Work in a well-lit area
- Be patient and take your time
Conclusion
Painting a motorcycle with spray cans is a practical and rewarding DIY project. With the right preparation, proper techniques, and attention to detail, you can achieve impressive results without spending a fortune.
As you’ve learned, the key steps include thorough cleaning, careful sanding, applying primer, using multiple thin coats, and finishing with a clear coat. Each stage plays an important role in achieving a smooth and durable finish.
If you follow this guide step by step, you’ll not only save money but also gain valuable skills and the satisfaction of customizing your motorcycle yourself.
FAQs
Q1: Can I paint my motorcycle with spray cans at home?
Yes, you can paint your motorcycle at home using spray cans if you follow proper preparation and safety steps.
Q2: How many spray cans do I need to paint a motorcycle?
On average, you’ll need 6–10 cans depending on the size of the bike and number of coats.
Q3: How long does spray paint take to dry on a motorcycle?
It usually takes 24–48 hours to fully cure, although it may feel dry to the touch within minutes.
Q4: Is spray paint durable for motorcycles?
Yes, if applied correctly and protected with a clear coat, it can last several years.
Q5: Do I need to sand before spray painting a motorcycle?
Yes, sanding is essential for proper paint adhesion and a smooth finish.