
Introduction
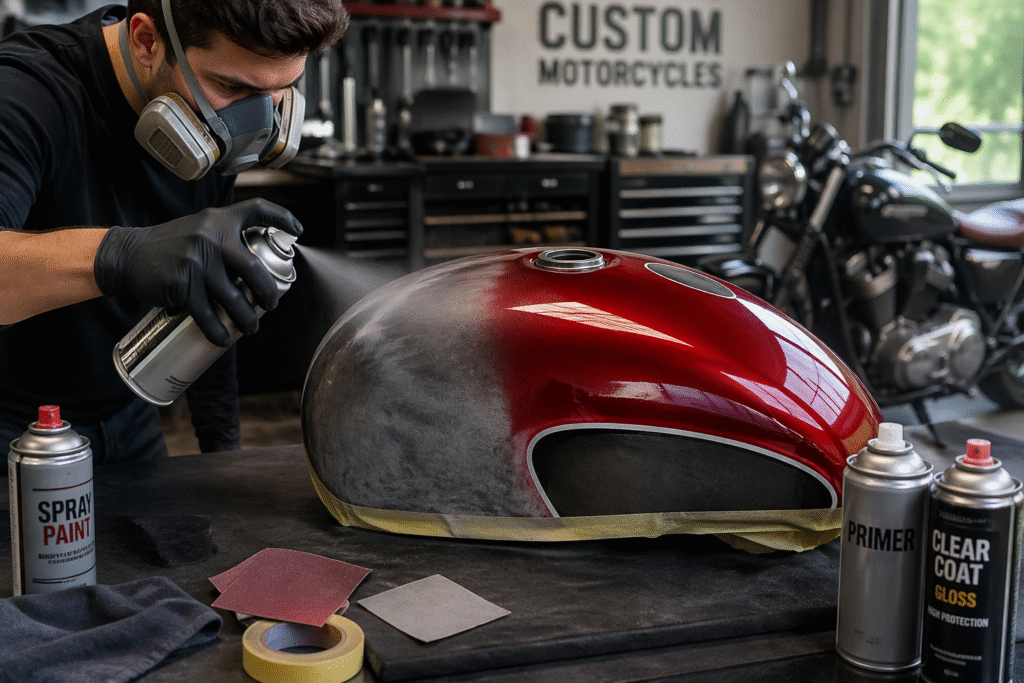
Customizing your motorcycle is one of the most satisfying ways to make your ride truly your own. Among all customization options, painting motorcycle gas tank with spray can stands out as a budget-friendly yet highly impactful upgrade. Whether your tank has scratches, faded paint, or you simply want a fresh new look, using spray cans allows you to achieve professional-level results without expensive equipment.
Many riders assume that painting a gas tank requires a spray gun and a professional workshop. The truth is, with the right preparation, technique, and patience, you can create a smooth, glossy finish right at home.
In this complete guide, you’ll learn everything—from tools and preparation to step-by-step painting techniques, expert tips, and common mistakes to avoid. By the end, you’ll have the confidence to transform your motorcycle tank into a head-turning masterpiece.
Essential Tools and Materials to Gather Before You Begin
Before jumping into the process, gather all the necessary tools and materials.
Essential Materials:
- High-quality automotive spray paint
- Primer (compatible with your paint type)
- Clear coat (for protection and shine)
- Sandpaper (80, 180, 400, 800, and 1500 grit)
- Masking tape
- Plastic sheets or newspaper
- Degreaser or rubbing alcohol
- Clean microfiber cloths
Safety Gear:
- Respirator mask (highly recommended)
- Gloves
- Safety goggles
Having everything ready ensures a smooth workflow and prevents mistakes caused by rushing.
Understanding the Basics of Spray Painting
Before you begin painting, it’s important to understand how spray painting works.
Spray paint is applied in thin layers, not thick coats. Each layer builds gradually, creating a smooth and even finish. Applying too much paint at once can cause drips, bubbles, and uneven texture.
Key Principles:
- Always spray in light, even coats
- Maintain a consistent distance (6–10 inches)
- Keep your hand moving—never stop in one spot
- Allow proper drying time between coats
Environmental conditions also matter. Ideal painting conditions include:
- Temperature: 20–30°C (68–86°F)
- Low humidity
- Dust-free environment
Step-by-Step Guide to Painting Motorcycle Gas Tank with spray can
Now let’s dive into the complete process of painting motorcycle gas tank with spray can.
1. Remove the Gas Tank
Start by safely removing the gas tank from your motorcycle.
- Turn off the fuel valve
- Drain any remaining fuel
- Disconnect fuel lines carefully
- Remove mounting bolts
⚠️ Safety Tip: Always work in a well-ventilated area away from open flames.
2. Clean and Degrease the Surface
A clean surface is essential for proper paint adhesion.
- Use a degreaser or alcohol
- Remove oil, dirt, and old residue
- Wipe with a lint-free cloth
Even small contaminants can ruin your paint job, so don’t skip this step.
3. Sand the Tank Properly
Sanding creates a smooth surface and helps the paint stick better.
Sanding Process:
- Start with 80–180 grit (remove old paint or rust)
- Move to 400 grit (smooth surface)
- Finish with 800 grit (fine finish)
If your tank has dents or scratches, consider using filler before sanding.
4. Apply Primer
Primer acts as a base layer and improves paint durability.
- Shake the can well
- Apply 2–3 light coats
- Wait 10–15 minutes between coats
After drying, lightly sand with 800 grit sandpaper for a smooth base.
5. Start Spray Painting
This is where your motorcycle begins to transform.
Proper Technique:
- Hold the can 6–10 inches away
- Use steady, side-to-side motion
- Overlap each pass slightly
Application:
- Apply the first coat lightly (mist coat)
- Wait 10–15 minutes
- Add 2–4 additional thin coats
🎯 Pro Tip: Patience is key. Applying several light coats delivers far better results than laying down a single heavy layer.
6. Let It Dry Between Coats
Drying time is critical for a perfect finish.
- Follow instructions on the paint can
- Avoid touching the surface
- Keep the area dust-free
Rushing this step can lead to fingerprints, smudges, or uneven texture.
7. Apply Clear Coat for Protection
Clear coat adds shine and protects your paint from damage.
- Apply 2–3 thin coats
- Maintain the same spraying technique
- Allow proper drying between layers
This step gives your tank that professional glossy finish.
8. Final Drying and Curing
After applying the clear coat:
- Let the tank dry for 24–48 hours
- Full curing may take up to a week
- Avoid exposure to dust or moisture
Once fully cured, reinstall the tank on your motorcycle.
Best Spray Paint Types for Motorcycle Tanks
Choosing the right paint is crucial for durability and appearance.
Common Types:
1. Acrylic Paint
- Easy to use
- Quick drying
- Good for beginners
2. Enamel Paint
- Durable and glossy
- Resistant to weather
3. Urethane Paint
- Professional-grade finish
- Highly durable (but more expensive)
Finish Options:
- Glossy (shiny and reflective)
- Matte (modern and subtle)
- Metallic (premium look)
Common Mistakes to Avoid
Even small mistakes can ruin your entire paint job. Here’s what to watch out for:
- ❌ Spraying too close → Causes drips
- ❌ Skipping sanding → Poor adhesion
- ❌ Ignoring primer → Uneven finish
- ❌ Painting in dusty areas → Contamination
- ❌ Applying thick coats → Runs and bubbles
- ❌ Rushing drying time → Smudges
Avoiding these mistakes will significantly improve your results.
Pro Tips for a Professional Finish
Want your DIY paint job to look like it was done by a professional? Follow these expert tips:
- Use a spray handle for better control
- Practice on a scrap surface first
- Wet sand between layers (optional for ultra-smooth finish)
- Keep consistent hand movement
- Work in a well-lit environment
These small details make a big difference in the final outcome.
Cost Breakdown: DIY vs Professional Painting
One of the biggest advantages of spray painting is cost savings.
DIY Cost:
- Spray paint: $10–$20 per can
- Primer: $10–$15
- Clear coat: $10–$20
- Sandpaper & supplies: $15–$30
👉 Total DIY Cost: $50–$100
Professional Paint Job:
- Typically ranges from $300 to $1000+
Verdict:
DIY is significantly cheaper and perfect for beginners willing to invest time and effort.
Maintenance Tips After Painting
After completing your paint job, proper maintenance will keep it looking fresh.
Do:
- Clean with a soft cloth
- Use mild soap for washing
- Apply wax after full curing
Avoid:
- Harsh chemicals
- Scratching the surface
- Pressure washing too closely
With proper care, your paint job can last for years.
FAQs
Q1: Can I paint a motorcycle gas tank without removing it?
Yes, but it’s not recommended. Removing the tank ensures better coverage and prevents accidental overspray.
Q2: How long does spray paint last on a motorcycle tank?
With proper preparation and clear coat, it can last several years.
Q3: Do I need a clear coat after spray painting?
Yes, a clear coat protects the paint and adds durability and shine.
Q4: What is the best spray paint for motorcycles?
Automotive-grade enamel or urethane spray paints provide the best results.
Q5: How do I fix paint runs or mistakes?
Let the paint dry completely, sand the affected area lightly, and reapply paint.
Conclusion
Painting motorcycle gas tank with spray can is an achievable and rewarding DIY project. With the right tools, proper preparation, and patience, you can transform your motorcycle into a personalized work of art.
The key to success lies in thin coats, proper drying time, and attention to detail. While it may take time and effort, the results are worth it—both visually and financially.
So, if you’re ready to upgrade your bike’s appearance without spending a fortune, grab your spray cans and start painting. Your dream custom motorcycle is just a few steps away.